Category Archives: Food
- 31
May 21

0

- 31
May 21

0
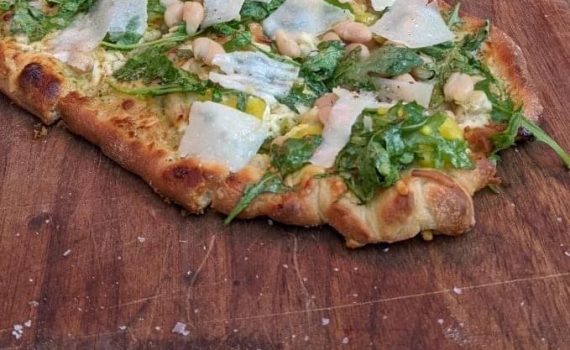
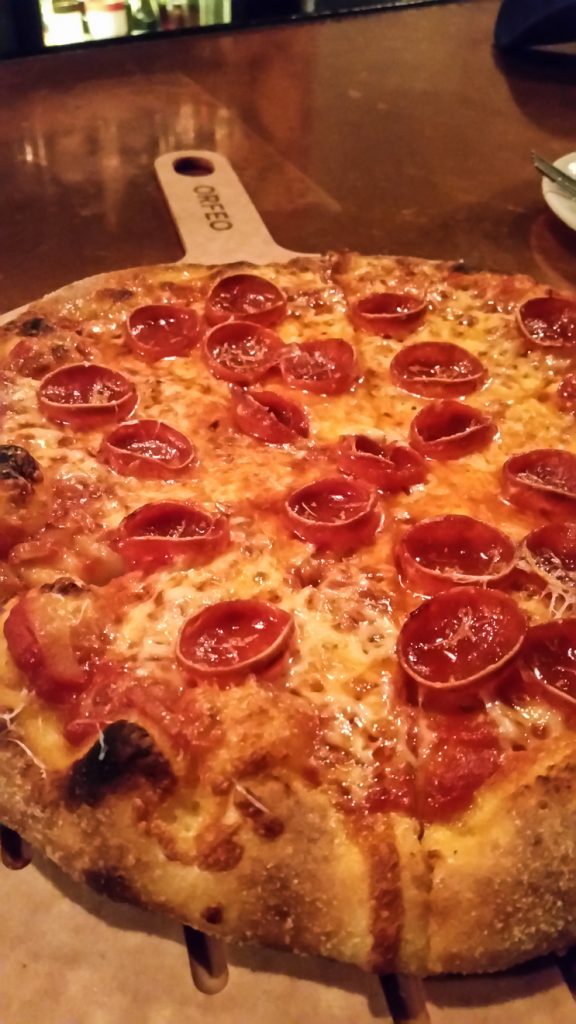
White bean, arugula, and parm pizza
Category:Food
Related Images:
- 24
Apr 21

0
Fast Food Chicken Sandwich: Burger King
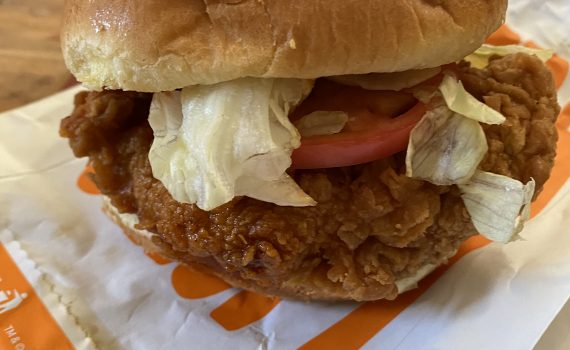
Category:Dining,FoodOur local Burger King always has a long cue of cars lined up at the drive through. So, one day, middle of the week, I decided to get ahead of the inevitable crowds and struck out early to snag the next contestant in our Fast Food Chicken Sandwich comparisons. This photo is of a recently unsheathed Spicy Crispy Chicken Sandwich from BK. It arrives in an insulated bag, perfect for taking home without the loss of too much heat. Immediately you can see this is not an ordinary take-out chicken sanny, it’s a beast. The fillet is white (why don’t they use the thigh?), wonderfully seasoned, and juicy, thick breast meat. The addition of the cooling properties of thick sliced tomato and whole leaves of lettuce plays well with the spicy crust and sauce all tucked between a lovely, perfectly soft but strong bun. It really doesn’t get better than this for fast food eating. Next up: KFC. It’s going to be hard to top the BK Spicy Crispy Chicken!
Related Images:
- 23
Apr 21

0
Willamette OR 2021 – Juanita’s Cafe y Neveria
Category:Dining,FoodDelicious lunch in simple surroundings in Dayton before starting out on tastings. Carnitas Quesadilla (half eaten in this shot) with perfectly crispy and flavorful carnitas and cheesy. Taco bowl with Chili Verde layered with grains also great. Give this place a try.
Related Images:
- 27
Mar 19

4
Gravlax
Category:Food Tags : dry brine gravlax salmonMaking Gravlax
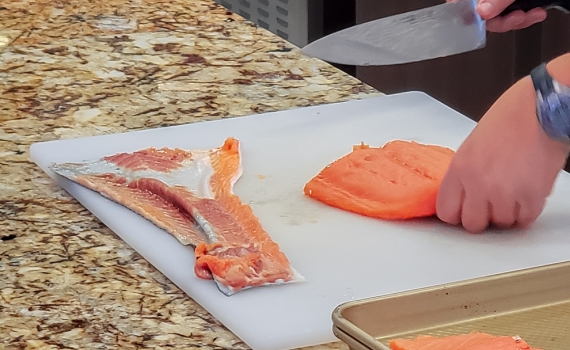
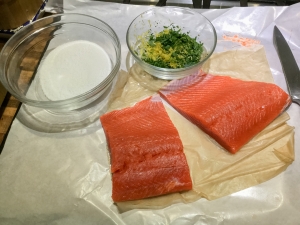
Gravlax is actually pretty easy to make. The basic recipe includes applying a dry brine with herbal elements to some fish protein. In this case, salmon, but it could just as well be another firm, meaty fish such as haddock or halibut. Most brines are made of some combination of salt and sugar rubbed on the flesh, put in a sealable bag or wrapped tightly in cling wrap and refrigerated for at least 24 hours. The recipe below is a spin off Oceania's Culinary Center 'If it Swims' on-board course.
Cured Salmon Gravlax
Ingredients
The Protein
- 1 lbs boneless, skinless, salmon fillet
The Cure
- 1/2 cup kosher salt
- 1/2 cup monk fruit sweetener Same amount of sugar, but won't be keto
- 1 tbsp pink peppercorns
- 4 juniper berries
- 4 allspice berries
- 1 bunch fresh dill
- 3 tbsp Ouzo Aquavit is a good substitute, or vodka
Instructions
Dealing with the Salmon
-
From your fishmonger, if you're lucky enough to live by a lake or ocean, get the center portion of the fish. Salmon from this section is typically 1" thick or more. If you're adventuresome, or have skills, you can de-skin the fish yourself. If you're new to this, have the grocer do it for you.
-
Run your hand over the length of the fillet feeling for bones. There is usually a line of thin bones near the thickest part running down the length of the fish. Pull out the bones with a pair of long, needle-nosed pliers. You can just pick up a pair at the hardware store, making sure they stay for kitchen use only! Be careful not to damage the flesh too much. Practice makes perfect.
-
Pat the fillet dry and place on a double layer of cling wrap, enough to completely wrap up the fish like you would a present.
Mixing the cure
-
This is the easiest part. Just thoroughly combine the salt and 'sugar' in a small bowl.
-
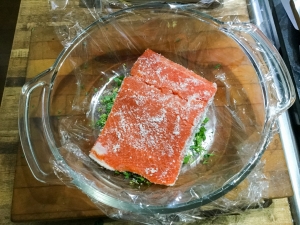
Place the double layer of cling wrap - about three times the size of the fillet - on a flat surface. Again, think of wrapping a present. Place half the salt & sweetener on the center of the wrap. Spread it out to the size of the fillet. Pour about half the remaining cure ingredients on top of the salt and sweetener. Place the fillet on the cure. Cover the top of the fillet with the remaining salt and sweetener, followed by scattering the rest of the cure on top. Wrap the fillet, but not too tightly. You want some of the water to get out of the wrapping during the cure.
-
Place the wrapped fillet on a baking sheet and place in the refrigerator for 24 to 26 hours, turning over every 12 hours.
-
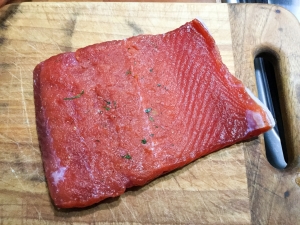
When the gravlax is ready, remove from the wrap and gently wash off the cure in cool water. Be gentle. Pat dry with paper towels and place on a cutting board of your choice. Thinly slice at a steep angle and you're ready to serve.
Serving up the Gravlax
-
Presentation depends on your style and occasion. I like a simple presentation. A few lemon wedges and capers, perhaps some sour cream on the side. Toast rounds or unseasoned crackers are also good to have near.
Related Images:
- 17
Mar 19

0
Patatas Bravas
Category:FoodNovember 16, 2018
Oceania Cruise line is well-known for its culinary prowess in the dining room. What you might not know is that they started the at-sea culinary class revolution, which is now in full swing on the high seas with most cruises in the luxury category offering several options for learning about local cuisine geared toward your itinerary.
Our cruise from Barcelona to Miami offered several culinary classes held in their state-of-the-art culinary demonstration-teaching center. Given our embarkation location and the cruise being a transatlantic crossing, you’d not be surprised to see courses on Spanish cuisine and the bounties of the seas.
We booked ahead – well before our departure – the Viva España and If It Swims courses; highly recommended as these courses are becoming very, very popular.
At the Viva España course we prepared –
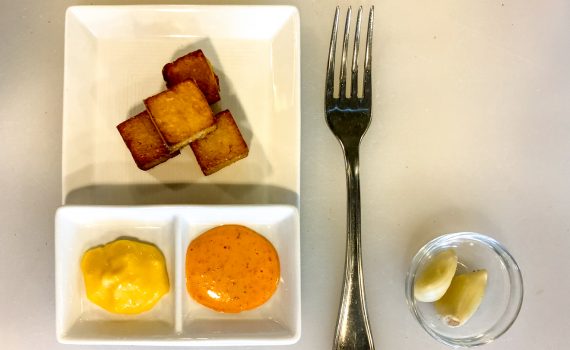
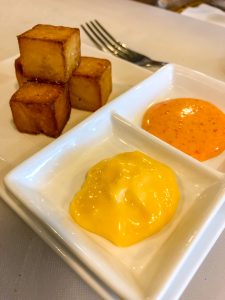
Patatas Bravas with Smoky Paprika Aioli (recipe below)
Pan Con Tomate
Seafood Paella
We were served Sangria Blanca as well.
At the If It Swims course we prepared –
Pan-Seared Scallops
Pesce All’Acqua Pazza (fish in crazy water)
Salmon Wraps A la Canyon Ranch
Fish Tacos with Asian Slaw and Sriracha Crema
Chef Kellie prepared Aquavit-cured Gravlax for us and served a good white wine.
These classes were offered in the shop's Culinary Center. This is a onboard cooking classroom offers two classes each day while at sea with a variety of topics throughout the cruise. At some ports, they offer shore side shopping trips to local market.
The classes are well run and fun. On Riviera, they're headed up by Chef Kellie Evans, formerly an associate food editor at Saveur Magazine. She commands a staff of 3 or 4 assistants. As a team they make the sessions fun, informative, and easy. Most of the tedious tasks of preparing your mise en place (all the cutting, chopping, and measuring) is taken care of by the staff. If there's a special technique that called for there will be a demonstration before you get to try it for yourself. You get to do all the cooking, assembling, and plating - and eating! - yourself. And the best part: they also do all the cleanup afterwards!
After the orientation to our workstations and introduction to what we'll be cooking, everyone comes to the front demonstration station where Chef explains a little about the dish, the ingredients, and the techniques involved as she shows how it's done. The we all go back to our own stations and try to replicate what she just did. The staff comes around to make sure we're on track and answer questions.
When one step or dish is done, we move back up to the front to learn about the next step. We're back and forth as we progress through all of the dishes in the course. Eating as we go.
Each session last for 2 hours, but the time goes by far too quickly.
Read more about The Culinary Center here: https://www.oceaniacruises.com/ships/riviera/life-on-board/culinary-center/
This recipe below is from the Viva España class. We made this Patatas Brava dish as well as the obligatory tapas Pan Con Tomate, and Paella. All while enjoying Sangria Blanca. Look for some more of these recipes in coming weeks.
Patatas Bravas
This recipe calls for a smoked paprika aioli with a little kick. Is spice isn't your thing, try a simple Lemon Aioli instead. For a more Latin American slant to the dish, use a Mexican crema.
Ingredients
Smoky Aioli
- 2 cloves garlic
- 2 egg yolks
- 1 cup olive oil extra virgin
- 2 each paquillo peppers
- 1 tbsp fresh lemon juice
- 1 tbsp Spanish smoked paprika
- 1 Dash hot sauce Tabasco or Cholula
- 1 Splash Aged Sherry Vinegar
Potatoes
- 2 lbs Russet potatoes peeled
- 2 cups olive oil
- kosher salt to taste
Instructions
Smoky Aioli
-
Make a smooth paste of the garlic by smashing it with the flat edge of a chef knife.
-
Whisk the egg yolks in a medium sized bowl until just pale. This should only take about 1 mimute.
-
While still whisking the eggs, begin adding the olive oil in a small, consistent, stream as an emulsion forms.
-
As the emulsion reaches the consistency of a thinner mayonnaise, stir in the mashed garlic, lemon juice, paprika and hot sauce.
-
Set aside.
Potatoes
-
Cut the potatoes to about 1 1/2 inch (under 4 cm) cubes. Cover with water. These will need to sit for at least two hours before draining allowed to dry.
-
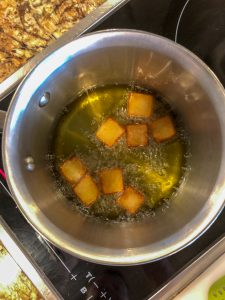
Heat the remaining olive oil in a heavy-bottom pan on medium heat until 375 degrees F (163 C). Add the potatoes and cook until lightly browned.
-
Remove potatoes from the oil and transfer to paper towels to drain. Let rest 20 minutes. Meanwhile, raise the temperature of the oil to 375 degrees F (191 C). Fry the potatoes again until crisp and lightly brown.
-
Transfer to fresh paper towels to drain. Sprinkle with kosher salt while still hot.
Finish and Serve
-
Divide the potatoes into 4 servings or in a larger bowl to serve "family style." Drizzle with the aioli. For extra flair, put a poached egg on top.
Related Images:
- 15
Mar 19

1
Old San Juan Food Tour
Category:Food,TravelSan Juan, Puerto Rico
Saturday, November 24, 2018
Land ho!
It's been 8 days since we left our last port of call in Spain, at Málaga. We were to have had two more stops in The Canaries. But, due to weather, and trying to out-run an enormous storm in the North Atlantic, we were not able to visit. We may have been able to get to the islands before the storm but would have been in the worst of it as we left. Rather than risking threatening seas, we headed further south before making our turn to the west. There was much disappointment among guest and staff. Many of the guests, like ourselves, were eager to visit Santa Cruz de Tenerife and Santa Cruz de la Palma. The crew relishes port days when everyone has gone ashore. What was planned to be one day at sea followed by two at port before the five-day crossing, now would be eight days at sea to do little but eat, drinking, and sunbathe - more about that in other posts.
On the 24th, we found ourselves within sight of Puerto Rico just as the sun rose through the clouds. This treated us to nice sunrise view of San Juan as we pulled into the harbor. We were looking forward to this port for a number of reasons. One being that we had booked a walking food tour of Old San Juan. The packages available through the ship were beyond our comfort zone in terms of price. But we did have internet so found something on our own. There were several to choose from, others already booked. The one we chose, and glad we did, was Spoon Food Tours.
The Fort - Castillo San Felipe del Morro
As soon as we were allowed off the ship, which took some time as this was our first arrival back to the US. The ship had to be cleared by customs before anyone could disembark. Those who had tours were allowed to disembark first. Then everyone else, all passengers and crew, had to get off the ship and go through immigration. We headed off as soon as we could and got an Uber to take us to the meeting place for our tour. It was a quick ride away up the hill, we probably could have walked but we weren't sure how long it would take - and it was uphill! We arrived in plenty of time to wander up to the fort for a few minutes and enjoy the morning sun. It was getting hot very quickly. A few tourists had already shown up at the fort but were thus far largely outnumbered by the young people using the perimeter of the fort grounds to get in their morning run.
The fort itself is a US National Park. We didn't have time to go in, but I'm sure it would have been interesting. Check out the website for more information: https://www.nps.gov/saju/index.htm.
But now it was time to meet our guide at the nearby Plaza del Quinto Centenario, a plaza built in 1992 to commemorate the 500 years since Christopher Columbus arrived in Puerto Rico.
Soon our guide, Gabriela, arrived as well as one other couple. We waited a while for one other person but attempts to reach her were unsuccessful so we headed on our way. These tours are limited to 12 participants, we were fortunate to only be the four of us.
First Stop - Don Ruiz Coffee at Cuartel de Ballajá
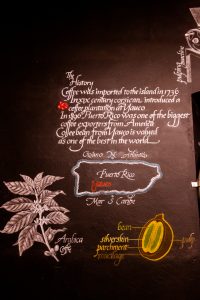
Our first stop was just adjacent to Plaza del Quinto Centenario in the Cuartel de Ballajá. This building was the former barracks for the fort. It's now home to the Museum of the Americas, and various other arts and culture organizations. On the ground floor you'll find Don Ruiz Coffee where you can enjoy some of Puerto Rico's finest home-grown coffee. Puerto Rico's coffee plantations are located on the south west side of the island and were 60-80% devastated by Hurricane Maria in 2017. Production has been slow, as you can imagine, to recover. Due to this, Don Ruiz is only serving their coffee in the coffee shop as of our visit. None is available for retail sale. They're just trying to survive at this point. Gabriela further mentioned that most coffee you find in stores around the world that say "Puerto Rican" needs further inspections. In many cases it's a blend of Puerto Rican and others. Look for 100% Puerto Rican Coffee. This is much the same as you find with "Kona Coffee."
At Don Ruiz we enjoyed a cup of cappuccino accompanied by a ham and cheese sandwich on Puerto Rican mallorca bread, sprinkled with powdered sugar. It would be easy to get addicted to starting your days with this sandwich on the soft, sweet bread. If you're familiar with King's Hawaiian bread, it's close, but this was so much more fresh.
After our coffee and sandwich, we took a look at the coffee museum they have in the back of the cafe. Here you'll find miniatures models of coffee roasters and other equipment. Also on display are patron-decorated coffee cups. Read the chalk board walls to learn about the coffee roasting process including the chemical structure of caffeine for the chemists in the crowd.
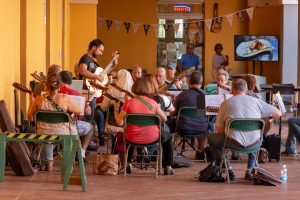
Before leaving Ballajá we had a chance to walk about briefly. A couple local bands were having practice while a few tourists milled about.
Second Stop - Farmers' Market
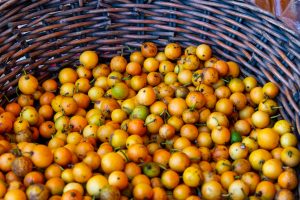
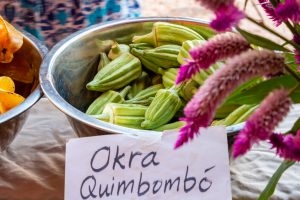
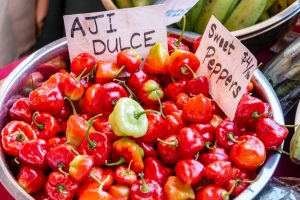
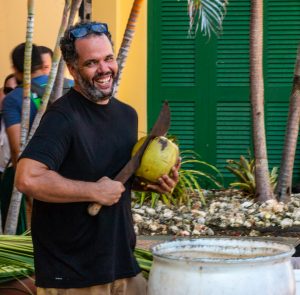
After our coffee we headed toward our next stop, passing by the fort grounds and the cemetery below. This next stop was at a simple farmer's market. There wasn't a lot here but it was nice to see a few things we don't typically have in mainland US. Some of the vendors took time to explain to us what a few things were with the help of our guide. Aside from these and the usual fresh herbs and fruits was a couple making vegetarian empenadas. Further down, a man was using a machete to cut open coconuts for refreshing drinks. We ended up getting a couple of virgin mojitos made in front of us. Refreshing in the increasing heat of the day
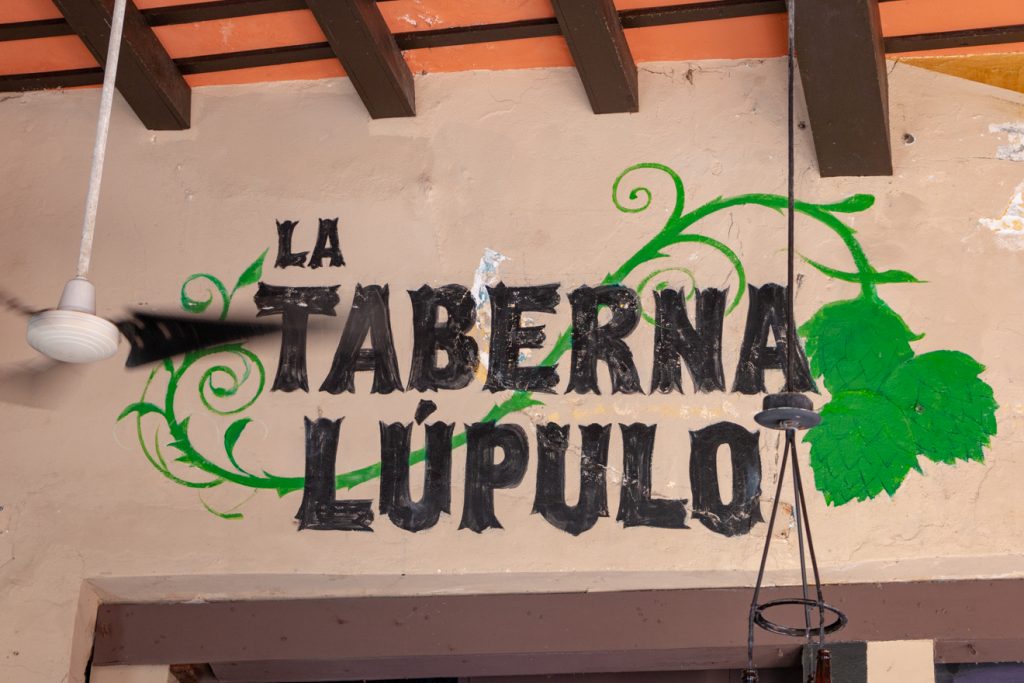
Third Stop - Taberna Lúpulo
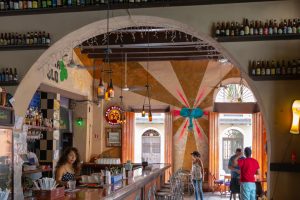
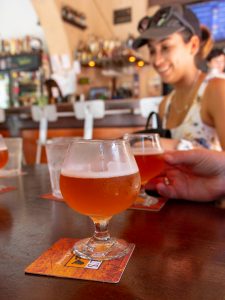
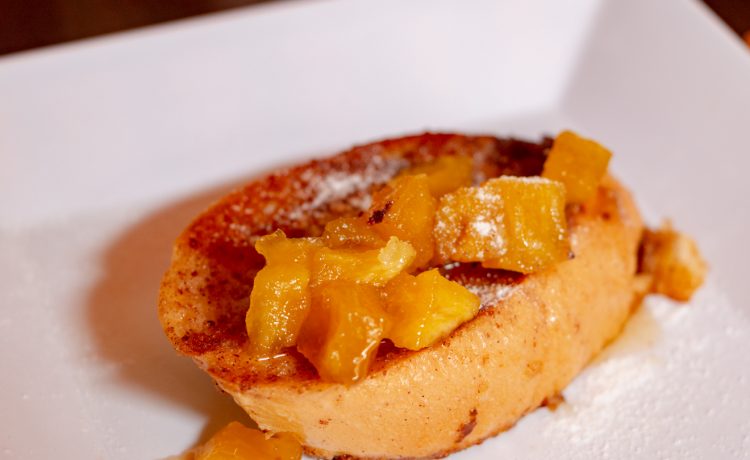
The beer joints of beer joints in San Juan. Taberna Lúpulo is quite the hot spot in the center of Old San Juan's nightlife. Live music and an astounding selection of (mostly) local brews. Also a popular spot for weekend brunch. Fortunate for us, even though this was a Saturday we had no problem getting in for our "brunch." On offer for our tour was what we’re calling a beer mimosa, and a french toast with papayas.
Walk About to Next Stop
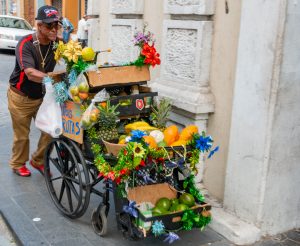
One reason we chose this tour was because it was a walking tour. There were others to chose from that were by van. The van would certainly have been more comfortable in the heat. But we were certain that walking through the town would allow us much more flexibility to stop here and there at our leisure (to some extent) to take picture.
Please enjoy these few snaps of our journey through the town.
Mofungo at Hecho en Casa
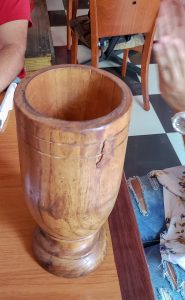
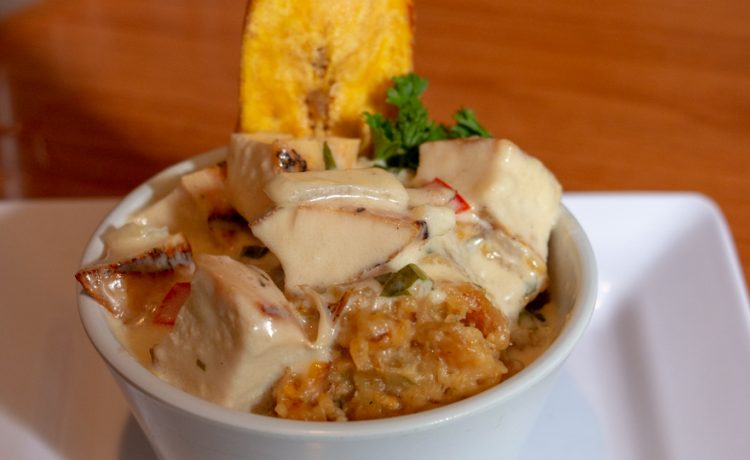
Next up was Hecho en Casa for our first go at Mofungo. If you're not familiar, it is the "national dish" of Puerto Rico. Simply put, it's a mix of primarily plantains and meat. Everyone's mother or grandmother will have their own variation. But in all cases the plantains are fried then mashed in a mortar and pestle, or pilón. It's then mixed with meats and a sauce of broth, olive oil, garlic, and pork cracklings. What could be wrong with that?
Our guide couldn't have been more ecstatic about this stop! Mofungo is the ultimate comfort food here in Puerto Rico. As I said, everyone's mother, grandmother, or aunt had their own special recipe. But what always went into it was a passion and love for the family. This is not an easy dish to make. It's hard, physical, work to smash the plantains in the pilón, and can only be turned out in one or two servings at a time. A true labor of love to make this dish for the whole family.
I'm not a big fan of plantains, but this was delicious!
Last Stop - Princesa Gastrobar
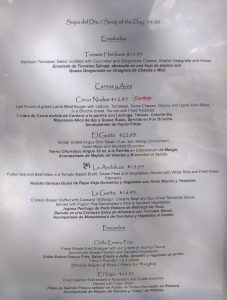
I wish we could have stayed for dinner - the menu looks amazing!
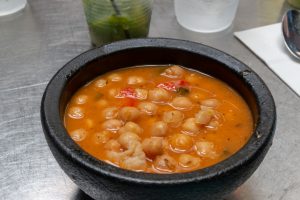
We were lucky enough to get a mojito (a real one!) and a cup of chickpea soup. The broth was very flavorful with just-picked herbs. Not a lot else to say about it other than if you're in Old San Juan stop by here, it's on the harbor side of Old San Juan. Ask for this soup or enjoy one of the other interesting options from the menu. If you do, please let us know what you tried.
Related Images:
- 08
Mar 19

0
Barcelona – La Boqueria
Category:Food,TravelBarcelona, Spain
Saturday, November 10, 2018
La Boqueria (Mercat de la Boqueria)
This is one of the big things we were looking to do in Barcelona - aside from the Sagrada Família and the Modernist architecture, of course - was La Boqueria. Located off famous La Rambla, this massive food market had something for everyone. We had been to a similar market in 2014 in Lyon, France, the famed Les Halles de Lyon. In fact, the air and feel of these two places are very much the same: tightly packed stalls and stalls of everything imaginable in the food world - soup to nuts, as they say.
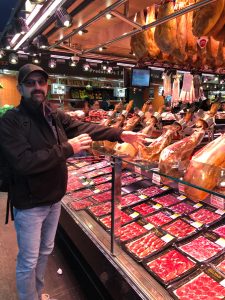
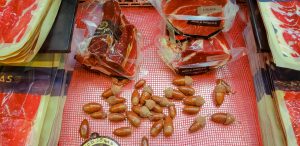
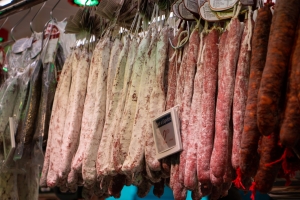
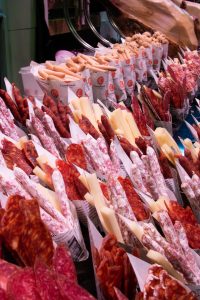
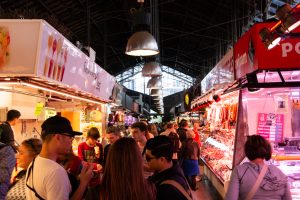
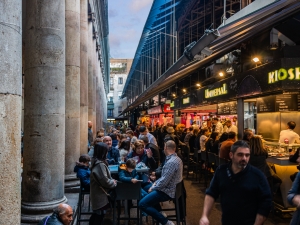
If you weren't looking for the place, it would be easy to pass right by. As you walk down La Rambla toward the water there are two entrances about 1/2 way down, off to the right. These entrances are set back from the street as if down alleyways or service roads. It may be calm out on the street, but once inside during the middle of the day, the market is buzzing. The most prominent purveyors are, of course, the charcuterie stands with all manner of cured meats, especially the jamón ibérico. Though there are produce stands throughout, this is no place for vegetarians and vegans!
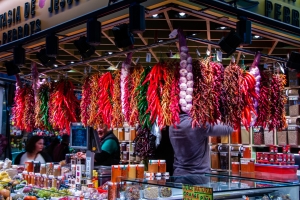
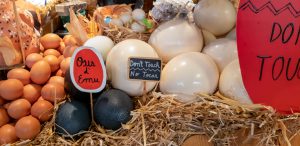
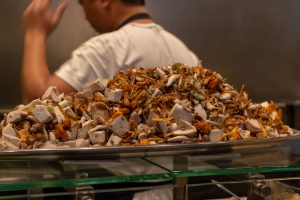
Aside from the cured meats, you'll see butchers, fish mongers, veggie stands, confectioners, dairy, florists, cheese shops, poultry, pastries and breads, pepper and spice shops, and just about anything you can imagine from the sea. Emu eggs, anyone? I'm sure I've missed something. If you aren't here to shop for your week's groceries, there are plenty of places to eat serving up the bounty of the market - but be prepared to wait for a seat when it's busy!
We actually made two visits here. The first time, we didn't realize we were so close and had already stopped for lunch at a nearby restaurant for paella. It was a nice lunch but was by no means adventurous. By the time we got here, things were already winding down for the day being late on a Saturday afternoon. We wandered about and took a few pictures, oohing and aahing at all the goodies. We have Pike Place Market here in Seattle, which really is quite amazing in its own way, but pales in comparison in terms of the variety on offer at La Boqueria. We vowed to come back for lunch one day before leaving Barcelona.
---Continued reading below these photos---
Lunch at La Boqueria
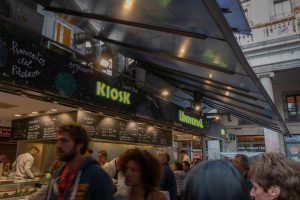
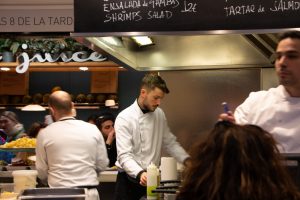
Kiosk Universal
Monday, November 12, 2018
The last day in Barcelona and our last chance to come back to La Boqueria for lunch. We finished at Casa Vicens just after noon and headed back across town to La Rambla. It only took a short while to get there on the Metro subway. Once there, we wandered about to see where we may want to eat. We ended up at Kiosk Universal which we had seen two days before and had caught our eye.
This place is situated in the front corner of the market, nearest La Rambla. It's set up with counters and display all the way around with all the cooking going on the in center. Each server works a few feet of the counter providing a combination of serving and preparing. A few of the staff were handling more specialized tasks such as manning the grill or prepping dishes. There were also a few surrounding table being served by staff. We put our name in and waited about 15 minutes for spots at the counter where we could see all the action.
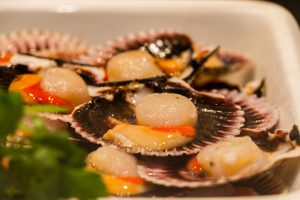
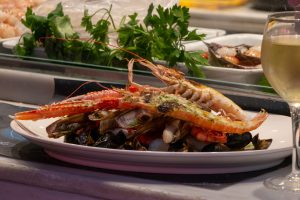
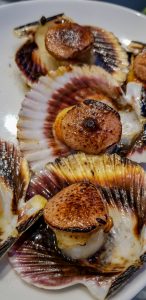
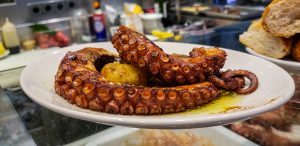
With a couple glasses of Cava in our hands, we started to order the food. Of course we started with Pulpo - grilled octopus. Then on to the steamed razor clams with langostine. Next up the seafood pasta with calamari, clams, mussels and shrimp. The winner was the sea scallops. Check out the video at the end of the this post to sea how our server "cooked" them in-shell with just a chef's torch - does a scallop really need to be cooked any more than that.
We couldn't eat everything on the menu, but we sure were tempted.
Find out more about La Boqueria at the official home page: http://www.boqueria.barcelona
Related Images:
- 21
Feb 19

0
Wild Mushroom Tarte
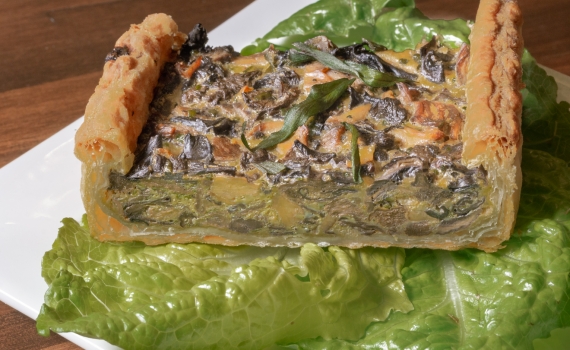
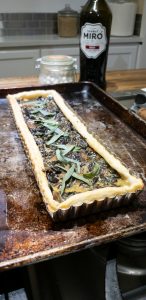
Category:FoodFor this recipe, check with your local wild mushroom seller to find out what varieties would go best with the tarragon. We’ve made this a number of times using whatever varieties were availabe at the time: lobster, cauliflower, white and red chantrelles which, in the Pacific Northwest, are available in late summer into fall. We also added criminis from the grocery store to fill out the volume (criminis are available all year in at most grocery stores). For true decadence add some morels! Farmers’ markets are a great source. We did try dried mushrooms to see how they would do. The flavor was ok, not great, but the texture was tough and rubbery. We strongly recommend sticking with fresh if you can get them. Also, from a strictly aesthetic point of view, you may want to steer clear of black mushrooms. As you can see in our picture, lighter mushrooms would look better. Before we soaked our mushroom mix, there were more white and orange ones than black. Once they soaked together, the light colored mushrooms absorbed all the black.
As for the puff pastry: don't even attempt to make this yourself! That is, unless you're really looking for a challenge. It's a nuisance to make whereas it's easy to find in most grocery stores. Pepperidge Farm is the most commonly found here but the last time we made this we used Dafour that we found at Whole Foods, which we quite liked. Check out the comparison at Serious Eats.
If you don’t have sweet vermouth, dry sherry would work just as well (not “cooking” or crème sherry, both having salt and other additives).
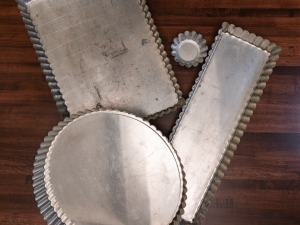
Our favorite pan to use for baking this is 6 x 13 x 1 removable-bottom tarte pan. Any other low-sided pan should work just fine; just adjust your volumes and quantities accordingly for your size pan. As long as you don’t go with a deeper pan, the cooking time should stay the same. You can even do individual serving sized, these will require less cooking time so keep an eye on them.
We haven't tried to add any grated cheese to the custard mix but fresh grated Parmesan made be a really good addition. If you try it, let us know in the comments.
Bon appétit!
Wild Mushroom Tarte
Ingredients
- 1 sheet Puff Pastry
- 1+ lbs Wild Mushrooms chopped
- 1 tbsp Fresh Tarragon chopped
- 3 eggs
- 1/4 cup Heavy Cream
- 2 tbsp Shallots chopped
- 2-4 tbsp Butter
- 2-4 tbsp Olive Oil EVOO
- 2 tbsp Sweet Vermouth
- Salt & Pepper to taste
- 12 Whole Tarragon Leaves or as needed for garnish
Instructions
-
Choose your size/shape of pan. Adjust the ingredients accordingly.
-
Rinse the mushrooms and pat dry. Coarsely chop the mushrooms, garlic, shallots and tarragon.
-
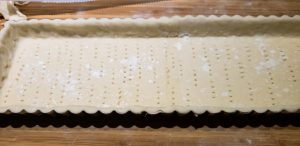
Lightly coat tarte pan with non-stick cooking spray. Unfold puff pastry and roll out to size of pan allowing for the pastry to go up the sides. Lay in tart pan making sure to press into all corners. Trim excess above top of pan. Perforate (dock) bottom of pastry with fork. Line with parchment paper and fill with pie weights (can also use dried beans or uncooked rice). Bake for 12-15 minutes, or as directed on package, until edges are light golden brown. Remove from oven and remove weights. Let cool on a rack in the tarte pan.
-
While pastry is baking, heat skillet with butter and olive oil. Saute garlic and shallots until softened being careful to not brown or burn. Add mushrooms and saute on medium low heat, if they soak up the oil and butter add more butter to keep pan just moist. Continue to saute until softened. Remove from heat and add the Sweet Vermouth (can substitute sherry). Return to heat and allow alcohol to burn off. Set aside to cool.
-
In large bowl beat eggs, add cream and chopped tarragon (reserve 1 tsp of tarragon of chopped or as whole leaves). When mushrooms are fully cooled, fold into egg mixture in small batches. Add salt and pepper to taste.
-
Pour entire mixture into shell, sprinkle 1/2 of the reserved tarragon on top. Place in oven and cook for 30 minutes or until set. If edges of pastry begin to brown before mixture is set, cover with aluminum foil and continue cooking.
-
Once cooled slightly, tarte may be removed from pan, cut and served. Sprinkle the remaining tarragon on top as a garnish. Can be served warm or at room temperature but is better slightly warm.
-
This entire recipe can be done in advance then refrigerated or frozen then reheated in oven to serve.
Related Images:
- 10
Feb 19

0
Snowy Day Chuck Roast
Category:Food,Sous Vide
Snowy Day Chuck Roast Sous Vide Style
Ingredients
For the Roast
- 3-4 Lbs Beef boneless chuck roast Bone-in would be great too.
- 2 Sprigs Fresh rosemary Leave whole
- 6 Cloves Peeled, fresh garlic, smashed
- Salt & pepper Be generous
- 1 Carrot, peeled and diced
- 1 Stalk Celery, diced Make dice similar size to carrot
- 2 Bay leaf
- 3 Tbsp Avocado oil Don’t use olive oil, smoke point is too low.
For the Sauce
- Contents from cooking bag
- 1 Tbsp Tomato paste
- 1 Cup Rustic red wine
- 2 Tbsp Chilled butter Optional
Instructions
Pre-Searing
-
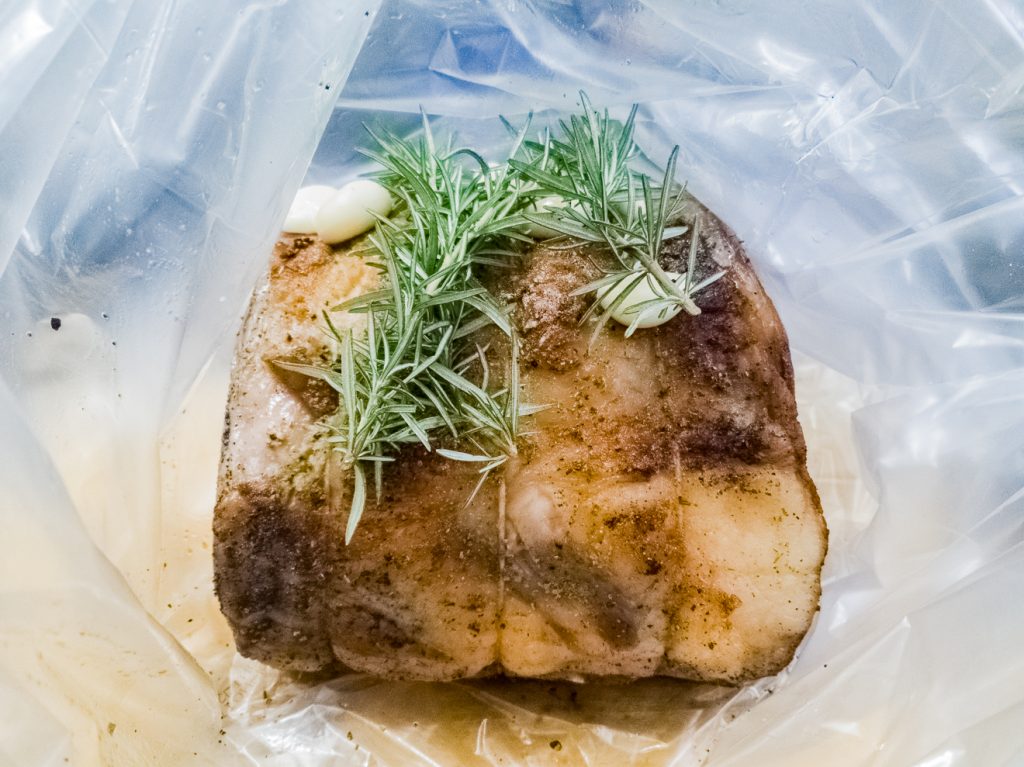
Using your sous vide, ours is the Joule from Chef Steps, set the cambro 3/4 way filled with water on a heat resistant pad to protect your countertops from the long cook this will need. Choose your temp. Here we’re going for that traditional roast look and taste, so we chose 136F. For more info on cooking this beast go to www.chefsteps.com.
-
Preheat a large, flatbottomed saute or frying pan on high until smoking hot. Thoroughly season your roast after patting it dry. You need to have the meat surface as dry as possible. Season all sides of the roast.
Turn on the exhaust fan!
Add the oil, swirl around to cover the surface of the pan. As soon as little whisks of smoke appear, slap down that roast in the pan. Use tongs to push down the roast so all parts are in contact with the pan. Give it a minute or two, depending on your heat source. Flip and do same on all sides.
Just before removing, put in the garlic cloves and fresh veg & herbs (rosemary, carrot, celery, and bay in this case) giving them a little heat. Remove everything from pan, set aside.
You can stop here, get a glass of wine, and get ready to bag this bad boy.
Bag It & Cook
-
Double up two freezer gallon plastic bags. Put in a small amount of oil (EVOO is good) into the inner bag. This is where you’ll put the roast and surround it with the veg evenly on both sides. Put one bay on one side of the roast the other on the other side. Easy!
Slowly submerge the bagged roast into the heated sous vide bath. You want to get as much air out as possible from the outer and inner bags. I use the blunt end of a long wooden chopstick to push the roast down, sealing the inner bag first, then the outer. It might still bob up a little. If that’s the case, try placing a heavy spoon in the bottom of the out bag and resubmerge.
Hook the bags to the side if you like, or let them free-float as I’ve done here.
Since this is a long cook (24 hours!), you’ll need to watch the water level. It’s best to cover the opening of your pot with plastic wrap. We have these nifty white plastic pearls that float on the top to help reduce water loss.
-
Get another glass of wine, and return in 24 hours!
-
Removing Roast - Gently remove your bagged roast. I hold a towel in one hand to place under the roast as I move it to the cutting board. Take out the roast and set aside for a moment, cover. A souse vide roast doesn’t need to rest technically. You’re going to put that roast back in the water to stay nice and warm while you make a luscious sauce.
Making that Sauce
-
The key to making a great sauce is to reduce and strain...strain multiple times! We learned this from watching a few Thomas Keller video’s on sauces. Thank’s Mr. Keller.
At this point, dump the contents of the bag into a Windsor pan, or suitable sauce pan along with the tomato paste.
Put the roast back into the bags...yes, back into the same bags, and reimmerse into the heated water. Don’t worry, it can’t over cook, but WILL keep your roast perfectly warm until eating time.
-
Add 1 cup of earthy red wine. Let it boil away, reducing by half until the liquid coats the back of a spoon. I don’t strain the sauce at this point because I want to get as much flavor out of the veg and herbs as possible. Plus, as they break down, they’ll thicken the sauce.
-
Strain the sauce. A good fine-meshed strainer works well here. We add a layer or two of cheese cloth to get the smoothest of sauces.
-
Return to the boil. At this point, it’s a matter of time tuning your sauce. Do the following as is your whim:
1. Reduce further for a thicker sauce.
2. Enhance sauce with store bought Demi glacé- we use veal Demi.
3. Further gild the Lilly with more fat! Just before serving, pull off heat and add in a couple of tablespooons of choice butter. Think Kerry Gold! Whisk until combined.
Serving it Up
-
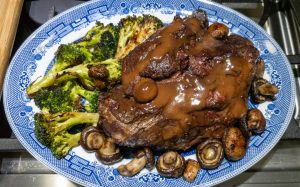
Remove the roast from the sous vide to a platter if you’re serving family style...best option for photo ops too.
Get as crazy and creative as you like.
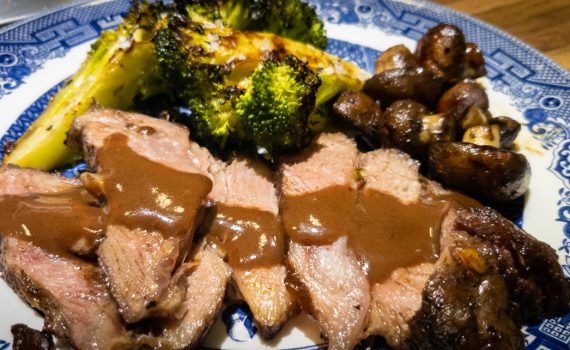
Add a couple of your favorite veggies to the platter, and pour on a little of that sauce you made over the meat.
Garnish with some fresh chopped parsley if you like..or not. Your choice, go wild.
Bring to table and watch their faces beam.
Plate & Serve
Related Images:
- 03
Feb 19

2
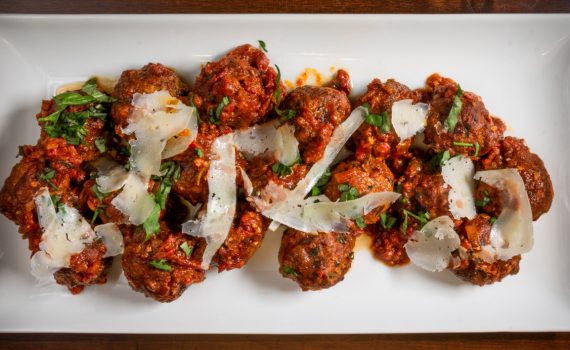
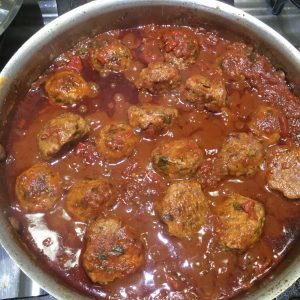
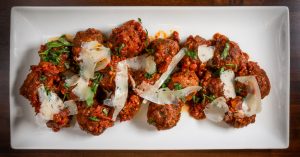
Albondigas (Spanish Meatballs)
Category:FoodOur Superbowl Snacks
February 3, 2019
Our God Daughter, Megan, came over during the Superbowl so we needed a few snacks to have on-hand. Still being inspired by our trip to Spain, we decided to stick with the tapas style goodies. However, not ones to be confined to convention, we've adapted and combined several versions to come up with a more "keto friendly" recipe. Not that we're totally about keto (Hello, wine!) but we are trying to avoid most carbs including bread, which is generally found in meatballs.
Here's what we came up with.
Game Day Tapas: Keto Albondigas in Tomato Sauce
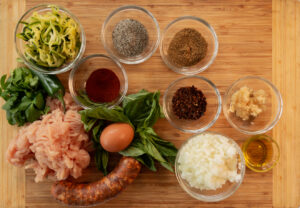
Ingredients
For the Meatballs
- 1 1/2 Tbsp Spanish Olive Oil, divided EVOO is good
- 1/2 Med Spanish Onion Minced
- 2 Cloves Garlic Minced
- 1 Tsp Smoked Paprika Sweet is okay
- 1 Tbsp Aleppo Pepper Flakes Substitute or leave out
- 1 Tbsp Cumin, ground
- 1 Lbs Ground Turkey Organic
- 1 Link Spicy Sausage Organic, local
- 2 Tbsp Manchego, grated
- 1 Lrg Egg Organic, local
- 2 Tbsp Cilantro, chopped
- 2 Tbsp Parsley, chopped
- 2 Tsp Kosher Salt, divided If using table salt, cut amount in half
- 1 Tsp Pepper, coarsly ground, divided
For the Tomato Sauce
- 2 Tbsp Spanish Olive Oil
- 1 Med Spanish Onion
- 1 Tbsp Smoked Paprika
- 1 Tbsp Cumin, ground
- 6 Oz Red Wine Spanish origin if possible, like a rioja or Navarro
Instructions
Meatballs
-
Heat olive oil in skillet on med-low heat until shimmering. Add paprika, cumin, and pepper flakes to bloom. Stir frequently. Dump onion and garlic all at once with salt and pepper to taste. Sauté until onion is translucent. Set aside to cool.
-
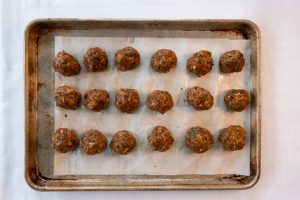
In a large bowl combine remaining indredients along with cooled onion mixture. Mix thoroughly with a fork making sure pork and turkey are evenly incorporated. Form into 1” balls by hand, or using a small ice cream scoop. Use some olive oil on your hands to prevent sticking. Place on parchment paper lined baking sheet into a 450 degree preheated oven for 15 minutes. Remove and set aside. You’ll add these to the sauce later.
Tomato Sauce
-
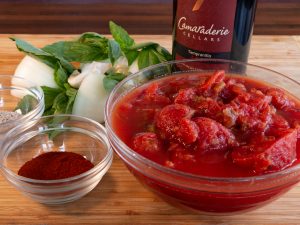
Heat olive oil in large sauce pan on medium low heat until shimmering. Add onion, paprika, and cumin. Stir frequently to toast the spices. Add garlic, saute for 1 minute. Next pour the red wine into the skillet, stir to scrape up any bits stuck to the bottom of the skillet. Cook for a few minutes. Add the tomato, stir to combine. Raise heat to medium and add chopped basil. Season to taste. Immediately add meatballs to sauce, rolling them around to get coated. Place lid on sauce pan, lower heat to simmer for 1 hour.
Related Images:
- 31
Dec 17

3
Prime Rib Revisited
Category:FoodChristmas Day, 2017
You all may remember our couple of posts from last year here and the one where we sous-vide our prime rib which I thought turned out great, Kevin was a little less pleased than I. So this year we got back to basics by slow roasting.
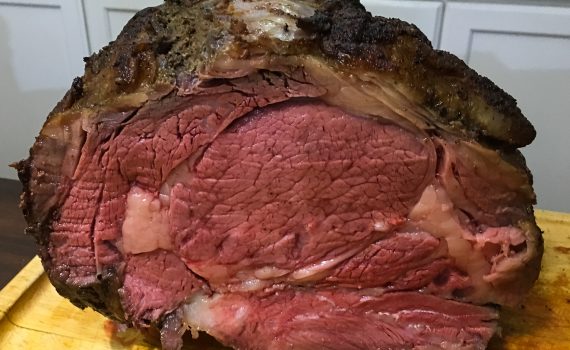
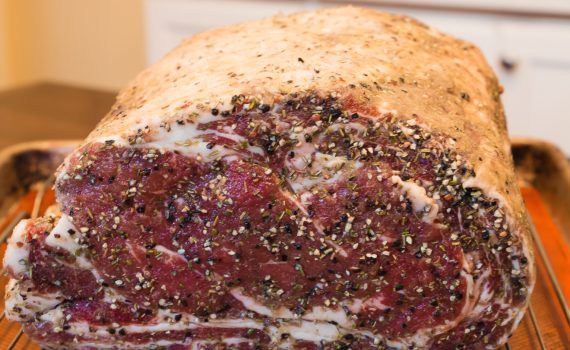
Both, the sous vide and the roasting started out the same, with seasoning and pre-searing. But that's about where the similarities end. After a little research online I found a method of slow roasting. It took some doing to find one I liked before I came across a recipe (can't remember where) that had the key pieces of information I was looking for; temperature and time. Their recommendation was 200F (93C) for 45 minutes per pound, so for 7.7lbs (3.5kg) this would take 5 3/4 hours. With getting the roast in the oven but 1:30PM, we thought we would have dinner on the table by 7:30 or a little earlier. Perfect!
However....it got to 127F over an hour early! Nothing else was even close to ready and our guest, David (who provided this lovely roast) wasn't even here yet. Yikes! With some hustling and playing with oven temperature (including just turning off the oven) we were able to stabilize it ultimately getting it no higher than 137F. By the time we had some drinks and conversation and first course (lobster bisque - Yum!) the roast had dropped back down. A little too low, if you ask me. Even though it really was quite perfectly done, it was cooler than I would have liked when plated. The au jus helped, but still, a little warmer would have been nice.
With all the hassle of maintaining the temperature and worrying about overcooking I'm reminded about the definite benefits of the sous vide method where of this worry is taken away. That being said, the texture of the meat came out somewhat superior with this slow roast than what we've managed in the sous vide. Granted, in the end this time, we cooked it to a slightly higher temp than we have targeted with the sous vide. Both methods have their benefits and drawbacks.
Perhaps next time we'll try the sous vide at a higher temp and see if that gets us to the same texture.
Related Images:
- 19
Sep 17

3
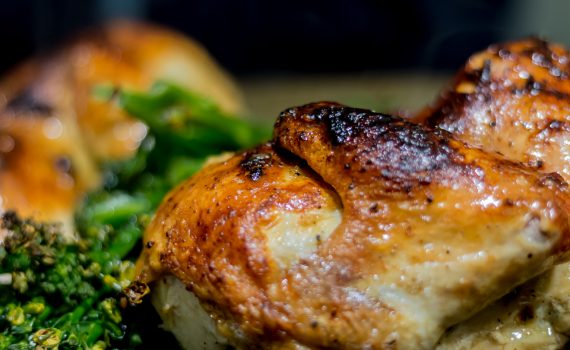
Ina’s Million Dollar Chicken
Category:Food Tags : Barefoot Contessa Challan Crème Fraîche Dan Silverman Food Network Ina Garten Roast Chicken The Standard GrillSeptember 19, 2017
It's chicken dinner night!
Last weekend we caught an episode of The Barefoot Contessa on Food Network. I know it's a stretch of the imagination, but she featured yet another take on roast chicken. This time featuring Chef Dan Silverman's Million Dollar Chicken from The Standard Gill in New York City. After a rained-out attempt at a grilled chicken, we thought we would give this a try. Here's the full recipe: http://www.foodnetwork.com/recipes/the-standard-grill-million-dollar-chicken-2145489 .
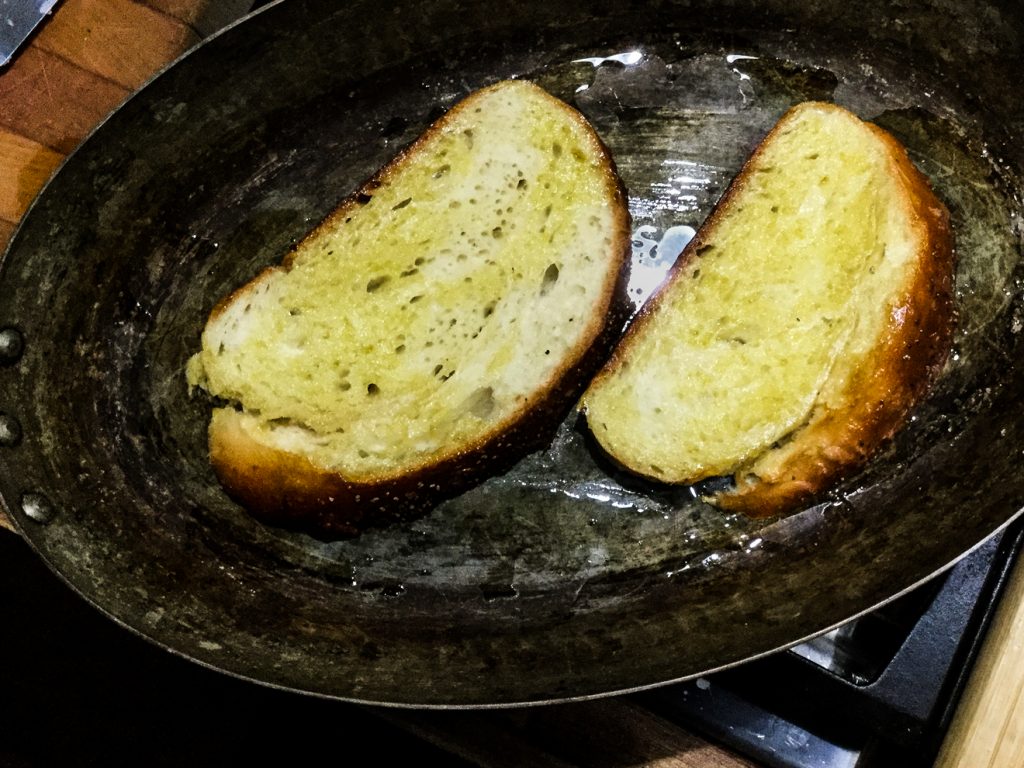
We deviated slightly right off the bat. Chef Silverman stuffs the cavity of his chicken with lemon, thyme, garlic, salt, and pepper. Kevin already had the bird halved down the middle, so stuffing it wasn't happening. Instead, we just seasoned the outside with salt, pepper and garlic powder and a good coating of olive oil. Then into a pan on top of a couple of slices of challah Kevin made yesterday (you all have fresh made challah in the kitchen, right??)
We got the oven heated up to the prescribed 450F then into the oven with the bird.
Meanwhile, we grabbed the crème fraîche from the fridge (we were surprised to find we actually had this!) and added the lemon zest, lemon juice, Allepo peppers, and grated shallot. It sat patiently until the chicken was almost done in the oven. The recipe mentions basting every 12 to 15 minutes. However, we didn't have enough drippings in the pan to do so until about the half-way point. At the last basting (about 1 hour in) we through in few stacks of broccolini to roast so at to have a little green with our dinner.
At one hour into roasting we removed it from the oven and coated it with the crème fraîche mixture and put it back in the oven for 10 more minutes as instructed.
While the chicken was in the oven, Kevin made some stock from from left-over chicken parts we found in the freezer. After a little simmer we had fresh stock to make gravy to pour of the finished bird.
The chicken turned out with tons of flavor. As of this writing, we haven't tried the breast meat; we both had a leg/thigh quarter tonight. we look forward to trying the breast mets.
About the bread: in Ina's video with Chef Silverman, the bread comes out toasted on both sides. We're not sure how that could happen. The chicken releases a lot of juice as does the crème fraîche. This resulted in bread that was soggy on the top and toasted on the bottom. We think they don't show in the video is either: the bread is turned over sometime during cooking or is toasted on the other side before serving. In any case, we enjoyed it as is. It may be a little too greasy for some, but it tasted like stuffing that could have actually roasted inside the chicken (kinda like a turkey stuffing). Yum!
Give a try - we really enjoyed it. Let us know how it turns out for you.
Thanks Ina Garten and Chef Silverman!
Related Images:
- 24
May 17

2
Grilling: Gas vs Wood
Category:Foodby Steven
24 May 2017
People occasionally ask us why we have both a gas (propane) grill and a charcoal/wood grill. The simple answer is that we can - we have enough room on our deck for both. The more complicated answer is that we simply enjoy the flexibility and options.
Which to use and when? It depends. The considerations being what we're cooking, what we want from the final flavor (smoked or not-smoked), the weather, and how much time we have for cooking. These aren't all the possible considerations, but they are the main ones we look at.
Rather than reinvent the wheel here (or would it be re-discover fire?) I'll refer you to this article from The New York Times - Charcoal or Gas? Depends on What You’re Grilling.
Happy grilling!
Food, Friends & Travel is a member of Amazon's affiliate program. By purchasing Amazon products through our website, we may earn a commission on qualifying sales. These commissions assist us in maintaining this site.
Related Images:
- 25
Apr 17

2
Two Fish Sous Vide
Category:Food,Sous VideApril 25, 2017
Another sous vide adventure this evening.
I got home just before Kevin, which is unusual as we typically leave work at about the same time, but his work is 1/2 the distance from home than mine. I took the opportunity to lay down in bed for a quick bit. Before I had the chance to nod off, Kevin got home and before I knew it, my phone had a message that the Joule had reached its set temperature. At that, my curiosity was piqued about what was on for dinner.
Upon getting dressed, gathering some laundry to throw in, I made my way downstairs to find some surprises in the sous vide - two kinds of tuna, Yellow Tail and Ahi. The Yellow Tail came from our friend, Ike, an avid deep-sea fisherman, whom we visited in Arizona in February. The Ahi came from East Anchor Seafood, just up the street.
Kevin had them in the sous vide just at about 62F to get them thawed and then raised the temperature to 122F for final cooking. Unfortunately, between catching up on the day and getting the laundry started, we lost track of the time that the fish was under the supervision of the Joule. In the meanwhile, and after some discussion about what to have for sides, Kevin got our potatoes browned (previously Joule cooled) in the skillet and broccolini ready to steam. I, on the other hand, prepared myself a Martini.
Once we deemed the fish to be done, which was pretty much arbitrary at this point, we got a pan going for searing. Both pieces of fish went in while the broccolini seamed nicely with a little chicken stock and garlic on another burner.
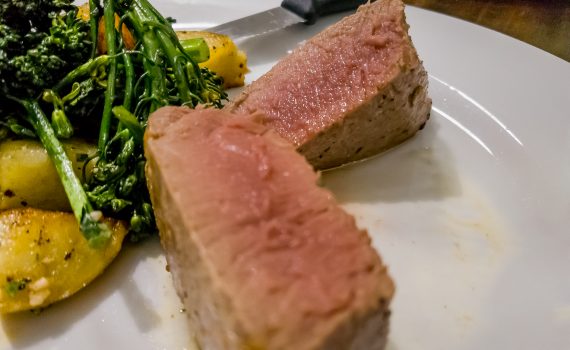
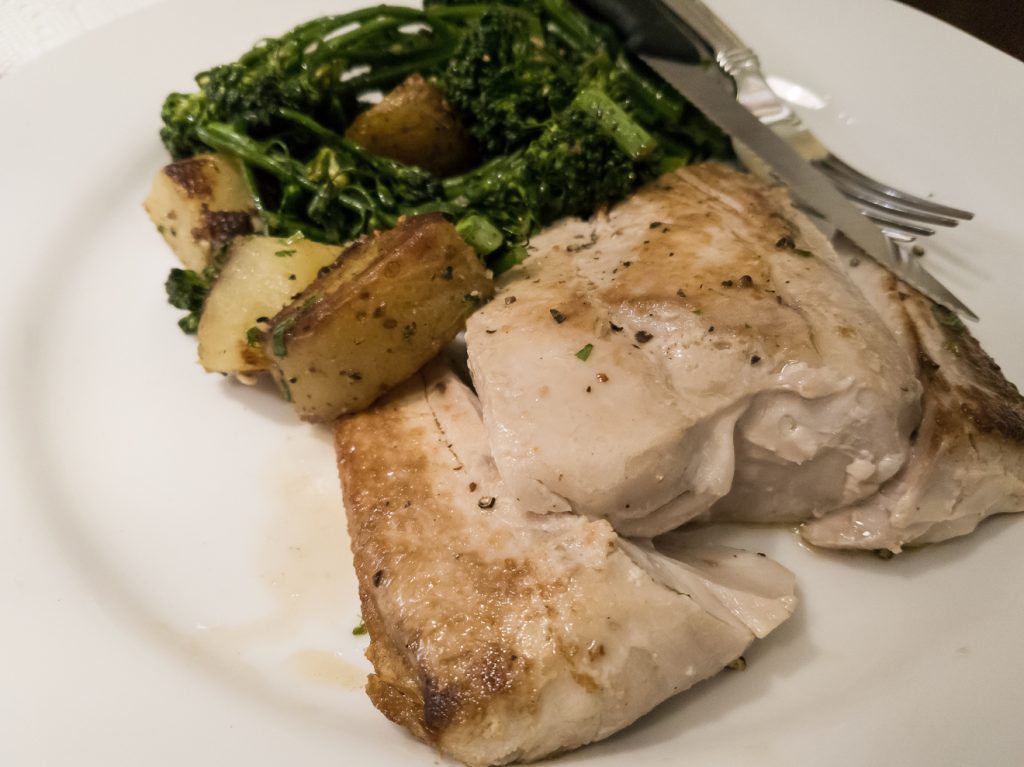
With a pat to dry each piece, it didn't take long to get a light sear on each, but it was quickly clear that we had the sous vide at too high of a temperature. The Yellow Tail was clearly cooked through to the point that it no longer wanted to stay together as one piece. However, it wasn't until I cut into the Ahi that the same error was evident. The meat was still red as you can see above, but it certainly wasn't the fish-equivalent of rare-to-medium-rare that I would have liked.
It was all still tasty, but not all that it could have been.
The lesson learned - lower temp on the sous vide. Or simply don't sous vide these cuts of fish. We'll try this again sometime but, I think, we'll target about 110F if we use the sous vide for this next time. Do any of you out there have any suggestions on how to make this better? Let us know in the comments if you do.
Steven
Food, Friends & Travel is a member of Amazon's affiliate program. By purchasing Amazon products through our website, we may earn a commission on qualifying sales. These commissions assist us in maintaining this site.
Related Images:
- 28
Mar 17

1
The Future of Pork Belly
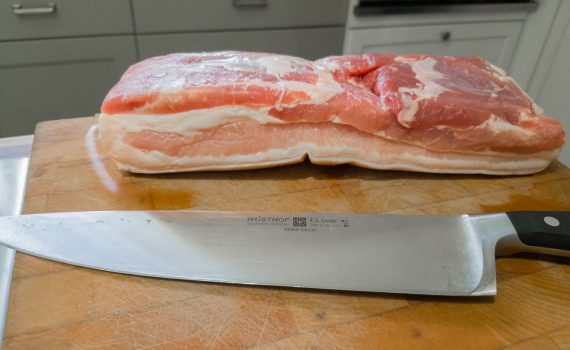
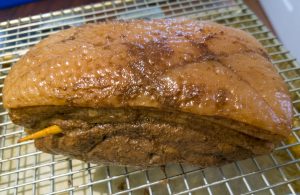
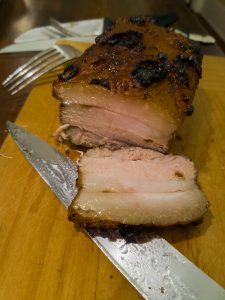
Category:Food,Sous VideA couple weeks ago we were up at the local Asian grocery store, Uwajimaya, and found a nice slab of pork belly (the actually called it pork side). Our first thought was "Sous Vide!" We got about a two pound piece to bring home. This weekend, we finally got around to throwing it in the sous vide and letting the Joule take over.
We cut it into two even-ish pieces to try two different rubs: one with just salt and sugar and one that added Chinese Five Spice powder. We read on Sous Vide Life about the need to put skewers cross-wise through the meat to keep it from curling up during cooking. We did this with the Five Spice portion, not with the other. As it turned out, even with these small pieces, it made a difference. The one with the skewers was much easier to slice in even pieces. If you do a larger piece, I would certainly recommend the skewers.
The rub: equal parts of sugar and salt and about 1 Tsp Five Spice to 1 Lbs of pork.
With both rubbed-up, Saturday they went into the sous vide for 24 hours at 154F. Our plan was to have them for dinner on Sunday. But as plans often change, we ended up going out for a lovely birthday celebration. So the pork had to wait another night, which worked out perfectly.
We took the pork out of the sous vide Sunday and put in the fridge for the night.
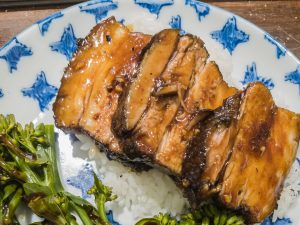
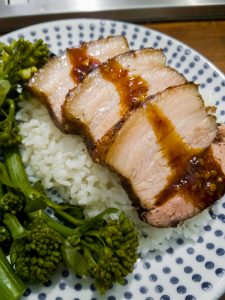
The next evening we pulled one out. To get it back up to temp, we put it back in the sous vide at 135F for an hour. This got it loosened back up and to a good "eating" temperature. It was already fully cooked and food-safe, so just needed to be warmed up. While it was finishing up, we got the broiler going to finish it. After the hour in the sous vide, it went under the broiler for about 10 minutes to crisp. Here's the result.
Meanwhile, Kevin created a sauce by pulling nearly everything 'Asian' out of the fridge: soy sauce, fish sauce, hoisin, Taiwanese peppers, ginger, garlic, and mirin. I can't give proportions here as we didn't keep track. If you decide to do this yourself, adjust as you wish. The rice was already in the works. All that was left was to steam some broccolini.
In the end, we ended up with a fantastic tasting dish. The pork wasn't quite as tender as we had hoped, but the flavor was certainly there! If we do this again, we'll probably drop the temp a bit and/or deccrease the time.
Here's how the final dish presented. Kevin had a little more sauce, mine the lesser.
I know most of you don't have a sous vide machine - yet! But if you try this, please let us know how it turns out. If you have a different way of cooking pork belly let us know that too.

Related Images:
- 14
Mar 17

1
Bacon! a la Sous Vide
Category:Food,Sous VideWho doesn't love bacon? (Sorry vegetarians and the pork-adverse!)
Well, we love bacon. But we don't love cooking bacon. Granted there are worse smells you can have in you home than bacon, but it's does tend to linger and permeate the house. We've found a better way: sous vide, thanks to chefsteps.com and Joule.

Shop our other recommendations here
This technique may not be for all bacon lovers. It doesn't make crisp, snappy bacon. If you like softer bacon with a little more chew, more tender and some fat left in it, this may be for you.
The ingredients are simple, just 1 Lbs of bacon. It can even be from you freezer. Here in Seattle, we're able to get Hempler's Uncured Thick-cut Bacon. It's still smoked but no added nitrates*. We think it tastes a little more "natural" and not quite as "salty." You're call on the cured vs uncured. Just saying, that's what we used.
The one intangible ingredient you need is time. With the Joule set at 147F/64C, this takes as "little" as 9 all the way to 48 hours depending on how tender you want it in the end (and how long you want to wait). So some advanced planning is required here. Once the bath is up to the set temperature, just through in the whole vacuum sealed package the bacon come from the store in. And wait....or just go to bed and try to sleep in the next morning even knowing that bacon is waiting for you.
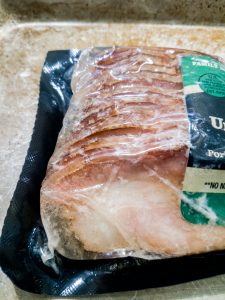
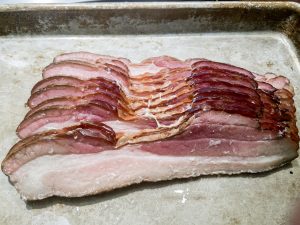
What it looks like just out of the bath:
 |
 |
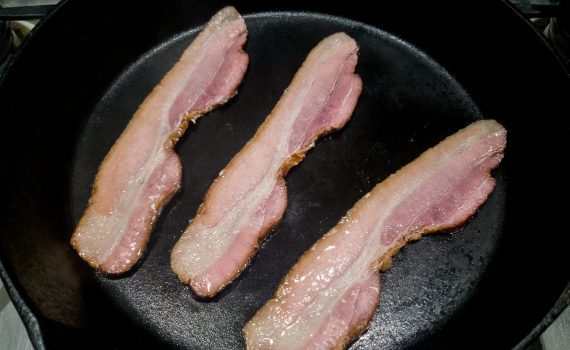
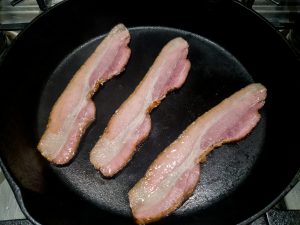
In the morning, it couldn't be easier. Just get out your trusty cast iron skillet or carbon steel pan or any pan, really, that can get smokin' hot. Don't use a Teflon pan, it won't like this much heat. When the pan is good and hot, throw on a few strips and let them sizzle for only 30 seconds. Chef Steps suggests just doing one side. We like it better with both sides seared. Just remember it only needs 30 seconds on each side since it is technically fully cooked already. You're just crisping it up a bit. Serve immediately!
This first photo is with both sides fried. The next shows the strips fried on only one side, the fried side showing on the left and un-fried side showing on the right.
 |
 |
The bonus feature is that you can have bacon all week long, if you don't eat it all on the first go. It can stay in the fridge so that you can quickly fry up a slice or two in the mornings throughout the week. Bacon in just a minute. In the words of dear Ina Garten, how good is that?
* We'll leave it to you to do your own research on the nitrate situation. Apparently nitrates occur naturally in many of the vegetables that dietitians and nutritionist suggest we eat. We choose "no nitrate added" bacon just because we like the taste better. To us, it's a more "natural" flavor and not as "salty." As with all things meat, moderation is key.
Related Images:
- 31
Dec 16

0
Grape Jelly
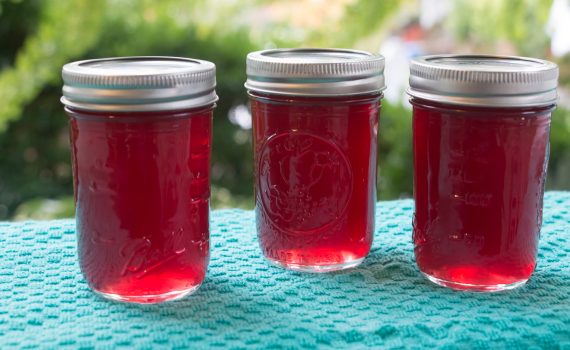
Category:FoodHere’s a little post from our home food adventures.
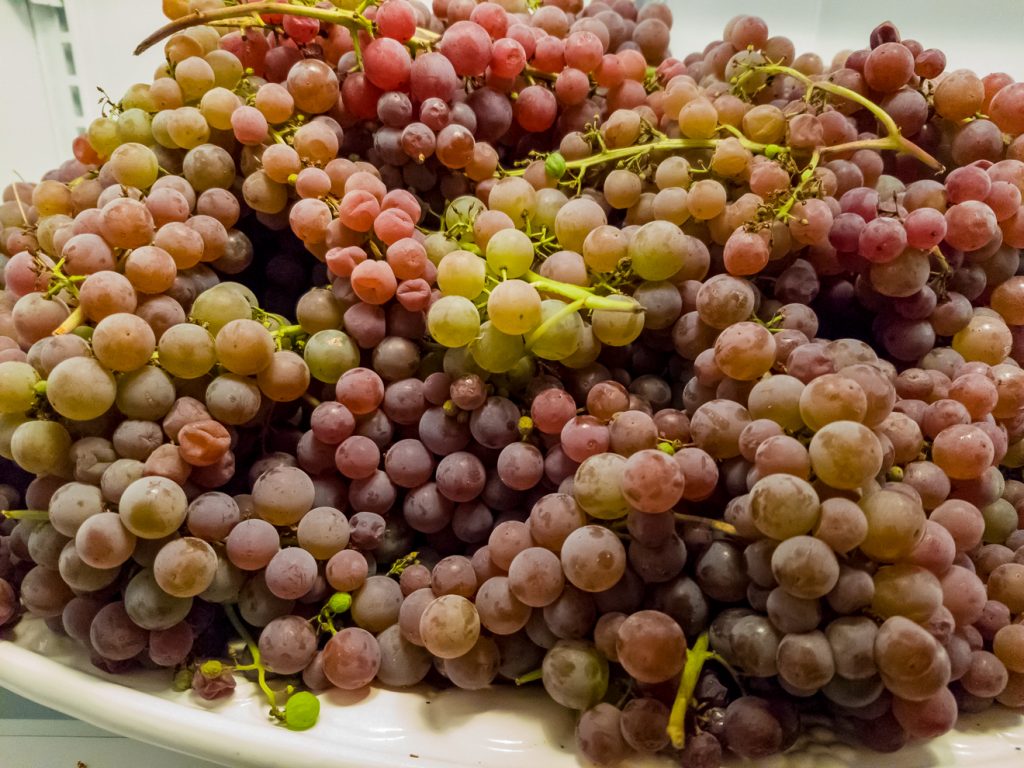
In late September Kevin and I and our friend, Robert, headed north for a nice little weekend getaway. We stayed at a friend’s house east of Bellingham, on the way towards Mt Baker. We arrived the day after the house/groundskeepers finished harvesting the wine grapes from the vine growing on the porch arbor. They had more grapes than they knew what to do with so offered for us to take some home. Not to miss an opportunity, though not knowing what we would do with them, we took about 5 pounds of grapes back home with us.
What to do with 5 pounds of grapes? Not enough to make wine – darn! – But enough to make grape jelly. A quick look on the internet and we’re in business.
There are certainly a number of grape jelly recipes on the internet. Most recipes have one thing in common: pectin. I knew that Jello makes a pectin. So I thought who could have the more technically correct recipes than the people who make the pectin – If they can’t get it right, who can?
I found their recipe at kraftrecipers.com/recipes/surejell-concord-grape-jam-60879.aspx
I'll reprint the entire process here if that page goes off-line (don’t worry; I have the text saved, just in case). I just want to mention a few things I did differently.
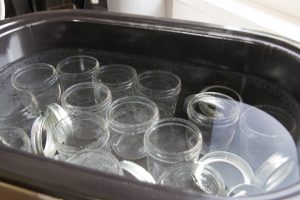
I don’t have all the “proper” canning equipment but easily found ways to make do. One part of canning, if you’re not familiar, is that you have to sanitize your jars by boiling them. I don’t have a large enough pot to do this so I resorted to our electric roasting oven. This took longer than on the stove top, much longer, but eventually got up to just barely a boil, but hot enough (checked with thermometer) to get the job done.
[What I didn’t think of doing, which probably would have been more efficient, is use the Sanitize cycle on the dishwasher. I’ll try to remember that for next time.]
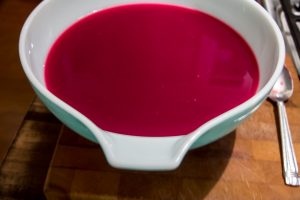
With the jars well on their way, I began on the jelly. I started off by getting the grapes off the stems and rinsing. Now it was time to weigh how much I had to work with and started in on the math of converting the recipe to the right amount of ingredients. The recipe called for 5 lbs of grapes. I had 8 ½ pounds. So not a simple, just-do-it-in-your-head math, unfortunately. But I have the technology!
Beyond adjusting for the proportions, I also added the juice of one very large lemon near the end of the boiling process. In the end you won’t really taste it, but I think it kind of “brightens up” the flavor. I do the same for my raspberry sorbet and it really makes a difference by helping to break some of the sugary sweetness.
Another thing to note is that the recipe says it takes one hour to complete. Don’t be fooled by this, it will take longer. Between sterilizing your jars and crushing the grapes you’re well over an hour into this, especially if your grapes are small. However, once you have the grapes wrapped in cheesecloth to drain, this mash can go into the refrigerator overnight. The rest of the process to getting the jelly into the jars does happen fairly quickly.
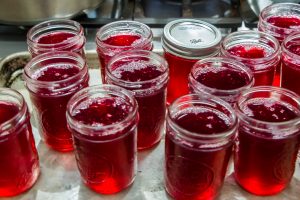
If you want to store your jelly on the shelf, you will need to continue the process through boiling the filled jars which will take some time plus the cooling time. But if you have the space in the fridge that you don’t mind giving up as you work through years’ worth of jelly, you can skip boiling the filled jars. We’ll probably give some away; I don’t like giving gifts that need refrigeration, especially if it needs to be shipped.
I know there aren’t many who will take the time these days to can their own anything. But this wasn’t that hard though it did bit of a time commitment. Worth it for having a good supply of jelly in the pantry and to give as gifts.
Related Images:
- 31
Dec 16

2
Prime Rib 2 – Sous Vide Style
Category:Food,Sous VideChristmas Day dinner with friends began the day before with the arrival of a hefty 3-rib prime rib roast. We knew that to sous vide a roast this size would take many, many hours, so it was necessary to have it handy Christmas morning to start the sous vide process.
It's gotten to be our tradition to have Christmas dinner with our friend David (ever since Steven had foot surgery Christmas Eve a few years back). In exchange for us cooking dinner, David provides the most wonderful prime rib roasts. He gets them at Metropolitan Market in West Seattle. This year's roast is from the blade end so it has a little more marbling - perfect! See our earlier post for tips on buying your rib roasts:
We consulted two websites for information and recipes on all-things sous vide: ChefSteps and Anova Culinary. We bought the Joule sold by ChefSteps, and that gave us access to their Premium area that contains extensive resources and training videos as well as other opportunities the Joule team dreams of. Plus we just like that ChefSteps is local, located in our very own Pike Place Market.

Shop our other recommendations here.
From a web search for sous vide prime rib recipes, we landed back at ChefSteps. Here’s the link to their herb crusted (prime) rib roast recipe, which they say was inspired by their own traditional rib roast recipe. At this writing, we’re having difficulty accessing the link on the iPad, but it works just fine on the iPhone, Samsung Galaxy, and MacBook Air. Hey Joule Team, you might want to look into this.
From ChefSteps:
| ChefSteps | Variation | Temp & Time |
| -1 Prime rib (rib roast), about 3 ribs | Ours was a “chuck” or blade end roast with 3 ribs, but the butcher cut it close to the 4th rib giving us more meaty goodness. Complete with herb crust. | 128F, 7 hours. ChefSteps meat guide places this in the Medium Rare category, just as we like it.
Timing was a bit longer than ChefSteps says (their’s puts it between 3 and 5 hours). We were having too much pre-dinner fun and just that puppy sit in the water, knowing it wouldn’t over cook. Love this about sous vide! The prep time takes a lot longer that you might think. That’s why we opted for a pre-prepped roast, saving us probably an hour or so. Remember, we’re novices at preparing such a large roast, it might take you a lot less time. Before going into the sous vide, ChefSteps recommends browning it on all sides. This just takes maybe 3 minutes on each side – about 10-12 minutes total. Be careful not to burn the roast so use a lower temp than we would in searing fish for instance. |
| -Salt -Pepper -Rosemary-garlic (3 cloves crushed) |
-No variation -No variation -One sprig, cut in two pieces -4 cloves crushed |
|
| For herb crust: -Herbs (fresh such as rosemary and thyme) -Black pepercorns, whole -Salt, Maldonado flake -1 egg white -Stock, beef |
-We skipped this entirely as our roast was pre-herbed from the butcher. | |
| Prep: | ||
| -To french or not? | Nope, no Frenching for us. | |
| -Scoring sides | Nope, didn’t do this either. Sounded too complicated, plus we didn’t French it so we thought to skip this. | |
| -Separating Bones | Once again, we didn’t need this step as our butcher already took the rib bones off the roast and tied the roast back together. | |
| -Removing membrane | We seriously thought about this step, and…yep, decided to skip it. No particular reason expect we were not feeling too motivated Christmas morning what with all the presents to open and such. | |
| Presear - Salt & pepper - Rosemary - garlic - cooking oil |
After seasoning roast on all sides, sear in pan over medium heat. We used a cast iron pan, which heats evenly and keep the heat longer than other pans we have.
This smokes up the house, so turn up the exhaust fan to high! |
|
| Bag it and get it going | We don’t have sous vide bags, so we doubled bagged it in oven roasting bags. ChefSteps cautions against using regular zip close freezer bags for longer cooking as the seams my give out.
Otherwise, we followed their guidelines and placed the roast in the inner bag along with the rosemary springs and crushed garlic. We used the water seal method since we don’t have a sealer (submerge the bag in water to force the air out then fold and clip to seal). This works just fine. |
|
| Cook - 4-6 hours |
7 hours was our total time in the sous vide. | Even at this length of time, the roast felt a little too squishy. We feared it would be European rare, which is cool…not something we like. |
| Finish
- 475F oven for 5-15 minutes |
Oven sear for 10 minutes. | Our roast was PERFECTLY cooked, but we wanted a little extra crisp, so we put the roast in the oven as ChefSteps suggested |
| Sauce | This got a little interesting. We kept the juices from the roasting bag and used it as the base for our sauce. |
I had a little kitchen accident – knocking the sauce pan off the stove. Maybe it was being bowled over by the beauty of the roast, or it could have been due to the glasses of wine consumed during oysters and our first course. Luckily I had a back-up sauce from another meal and just enhanced it with what was salvaged from the spill. |
The roast ready to start in the sous vide bath:
This was probably the most delicious, tender, perfectly cooked rib roast we’ve ever cooked or had at a restaurant. Honestly, it was. We’re not kidding.
We had plenty of left overs from the four of us, and that was with a couple of people going back for seconds. Alas, my sauce didn’t last.
Accompanying our Christmas Day meal was a potato-noodle savory kugel and roasted carrots and green beans seasoned with garlic, salt, pepper and Harissa.
We can’t recommend sous vide cooking enough. Since getting our Joule a month or so ago, we’ve experimented with several meals, most turned out exceptionally well. Go get yourself one of these, it’s not just kitchen toy, it’s really very useful as an all-around tool for the home cook.
Related Images:
- 28
Dec 16

0
Aqua by El Gaucho & SAM Sculpture Garden
Category:Dining,FoodAqua – 12/15 before SAM Sculpture Garden walk-about
We had tickets to what we thought was going to be a special event at the SAM (Seattle Art Museum) Sculpture Garden down on the waterfront. We drove around a little, finding no parking which isn’t that unusual in that area, and decided to stop in to Aqua by El Gaucho for a drink and maybe a snack.
Aqua never disappoints. The space, on a pier at the north end of Seattle’s waterfront, is literally on the water as its name implies. The dining room menu has a wide range, but focuses on things from the sea. Again, a nice match of location and dining experience. But, we didn’t really want to spend the money such fine dining demands so sat at the bar instead.
Being in the holiday mood, we ordered Manhattan’s made with Bulleit Rye – my favorite whiskey ($13.50 each). Sipping a finely crafted cocktail…especially an old-school one like the Manhattan…in a lovely space as this is a treat.
We needed some nourishment, so we looked at the bar menu. They don’t have a happy hour menu per se, but have a regular bar menu instead. The upside is that you get great value at any time of the day. I had the Pier 70 Burger – my litmus test for just about any new place I go ($14). Steven had the Steak frites ($18).
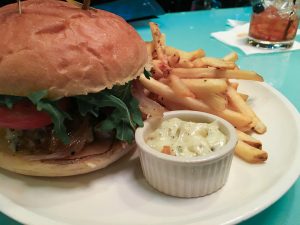
My burger was probably the best high-end bar burger I’ve had in a long time. The toppings were pretty straight forward - lettuce, tomato, and ‘special sauce’ - and didn’t compete with the beef, which not incidentally done to a perfect medium rare. It seems the new standard bun type is the brioche. I think they are a bit too much bread for my tastes, but given the heft of the burger, I’m not sure there would be many other options. With the ciabatta long out of style and too chewy in the first place, the brioche is a fine compromise. With most burgers from other higher end pubs and restaurants coming closer to the $20 mark, this one at $14 is almost a steal. And I can’t believe I’m saying a $14 burger is a steal. My Midwest upbringing is devastated.
 |
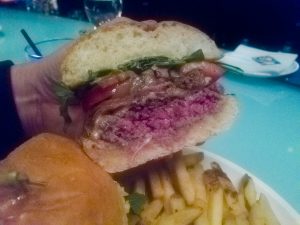 |
Steven had the Steak Frites. I’ll let him fill you in on his choice.
Steven here - Yes, I had the Steak Frites. A steak at Aqua for only $18?? The starters at the main El Gaucho in Belltown are that much or more. It was a fairly small steak, as you can imagine from a bar menu. The pile of frites, however, were generous. All in, though it actually makes a sufficient sized small meal. The steak was not surprisingly cooked perfectly and the frites fresh. Oh, and the pan reduction, that may well be the best part.
Xxxx
Oh, and don’t waste your special ticket on the SAM Sculpture Garden Christmas walk…or whatever it was if they do it again next year. The whole thing was disorganized and we never did see what made it a special event.
Related Images:
- 07
Dec 16

3
Beef, Specifically Prime Rib
Category:Food Tags : Beef Cooking J. Kenji Lopez-Alt Prime Rib Roast7 December 2016
by Steven
Yesterday I was reading an article about how to sous vide a rib roast (more about that perhaps in a later post). The article, Classic, Oven-Roasted Standing Rib Roast, talked about the difference between the blade end and the loin end of a rib roast. Who knew there was a difference? Well apparently butchers and trained chefs know this, but I didn't. This got me to looking up more about it. Off to Googleland!
First stop: Serious Eats
One article let to another, and another, and....
I won't repeat all that I found here myself for risk of plagiarizing, so please, check out Serious Eats for yourself - besides, I don't have enough of my own pretty pictures of rib roasts!
If you plan to or even just want to someday cook a rib roast, this article is a great place to start: The Food Lab's Definitive Guide to Prime Rib.
Food, Friends & Travel is a member of Amazon's affiliate program. By purchasing Amazon products through our website, we may earn a commission on qualifying sales. These commissions assist us in maintaining this site.
Shop our other recommendations here.
Make sure you follow up with his related articles that he links to, specifically: How to Cook a Perfect Prime Rib and How to Carve Prime Rib Like a Pro.
For anyone who likes to cook steaks and roasts, don't miss The Importance of Resting Meat. We've long since known the importance of resting meat after cooking, Chef López-Alt gives a great explanation of the why and for how long. I'm sure, like me, you've been to far too many restaurants that rush a steak to the table right off the grill on a super-hot plate. I hate this! I cut into the meat and all the juice runs onto the plate leaving it drier and less succulent than it could be. The hot plate continuing to cook the meat so that by the time you get half way through, the rest is now overcooked and lifeless. López-Alt will teach you how to make sure this doesn't happen to you at home. Check it out.
The writer, J. Kenji López-Alt, has been popping up more and more on the internet when I do searches for various cooking how-to's and what-for's. You may have also heard him on NPR or seen his book The Food Lab. I'm not a scientist myself by I can get my geek on reading all the sciencey aspects of cooking. Chef López-Alt does a great job at breaking it down without getting too buried in the weeds.
Bon Appétit
Related Images:
- 25
Nov 16

1
TK Noodle House
Category:Dining,FoodWe're off to the Islands! The Big Island of Hawaii to be exact. This is a pilgrimage of sorts that we make every couple years.
First day - off the main drag of Ali'i Drive, on our way from the airport to our timeshare at the Kona Coast Resort II, we stopped by the crafts market just south of the main part of town. This is the Ali'i Gardens Marketplace where we found Greg, owner of Kona Natural Soaps whom we had met on a previous trip. After chatting and catching up on his new products we went away with two original design t-shirts, a baseball cap for me, and a soap made from flower and botanical essences – Greg’s claim to fame is the high quality of the essences and the healing properties of his combinations.
The shopkeeper in the stall next to Greg offered up her favorite places for noodles and Thai food. You might think that given the culinary influences of the many Pacific rim countries who settled the Islands after the Tahitian’s, that there would be a good number of wonderful choices. But alas, Kona has yet to to fully embrace it’s multi-culinary roots and promoting authenticity and local products and produce. There are bright shining lights out there, but just a few. Most other eateries in Kona you could find anywhere in the USA, each with their own sad versions of ‘localized’ items, like frozen-then-fried calamari you’d find at Chili’s but this time slathered in the sticky sweet-spice red chili sauce dowsed over items the kitchen wants to call ‘Asian’.
The top recommendation was TK Noodle House not far away. We looked up the address after checking into the condo and set out. We headed for the Kona Village location, he also has a place in Captain Cook.
As I write this I’m making a breakfast of left over Braised Beef Short Rib Hot Pot. Pardon the occasional slurp.
TK Noodle House
Just up-mountain (Mauka) from Ali'i Drive sits one of the most memorable noodle houses you’ll go to on The Big Island. The chef, TK is somewhat of a new comer to Kona side, opening this shop in a small shopping center in downtown Kona about 2 years ago.
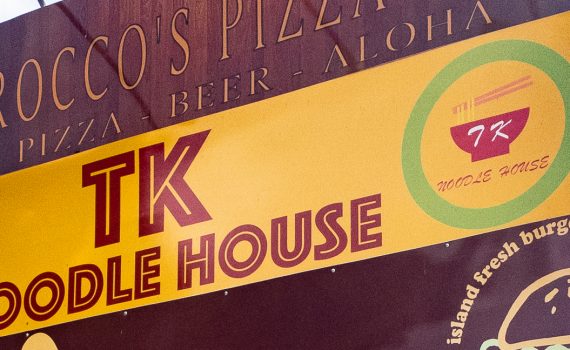
The place was a bit hard to find for us. We followed the crazy directions of Siri and ended up in the parking lot of the small shopping mall where TK is located. The trick was deciding which door was TK and which went someplace else. In Hawaii many shop doors are on the outside of a building, not in some inside corridor. The signage was on a banner covering the former restaurant’s name, very hard to tell if we were in the right spot. I stooped down to look inside a window and after see the plates of steaming food and bowls heaped with noodles and vegetables, we pretty much thought we’d found the place.
TK actually has three doorways and three distinct eating experiences, making it all the more confusing for first-timers like us. We chose door number one, the noodle shop. The second door we found out was for the make-it-yourself dinners in soup pots at the table and the third area was for their desserts. After looking at the cook-it-yourself menu, we decided on staying with the noodle shop. We might just have to come back for the others.
We were pretty hungry and after a look around to see what other diners were eating – trying to get a gauge of portioning – we order an appetizer, Fried Calamari. Nothing too adventurous I admit, but one of us wanted to play it safe at first. Plus, you know how it is when you’re just too hungry and need to eat…choices are not your friend at that point. Pouring over the thickly laminated menu didn’t help. Everything looked worth a try and a few stood out as must haves.
I asked our server for her recommendations. It’s something I do when seeing too many good things, plus, when trying out a new place with a chef I don’t know, it makes sense to ask what’s good. Servers generally know that you are asking for what is best on the menu…admittedly a subjective thing, but I’ve not been disappointed that often by asking.
Depending on what I had a taste for, today it was noodles, she recommended the Charred Beef Noodle. For noodle soups, she thought the Oxtail was a good choice. There was also the Beef Salad to consider. After seeing the portions sizes coming out of the kitchen, we restrained ourselves and skipped the salad…a good thing we did.
Here at TK, they portion to share. Everything is shareable. A few tables started with a salad, which was served on a platter heaped up so it looked like a salad landslide could happen at any moment. Delicious-looking charred beef topped with more fresh greens and colorful local garnishes. Like I said, we restrained ourselves, but ate it up with our eyes.
Before the calamari arrived we settled on the Braised Oxtail Noodle soup and the Braised Beef Short Rib Hot Pot – I skipped her suggestion of Charred Beef Noodle.
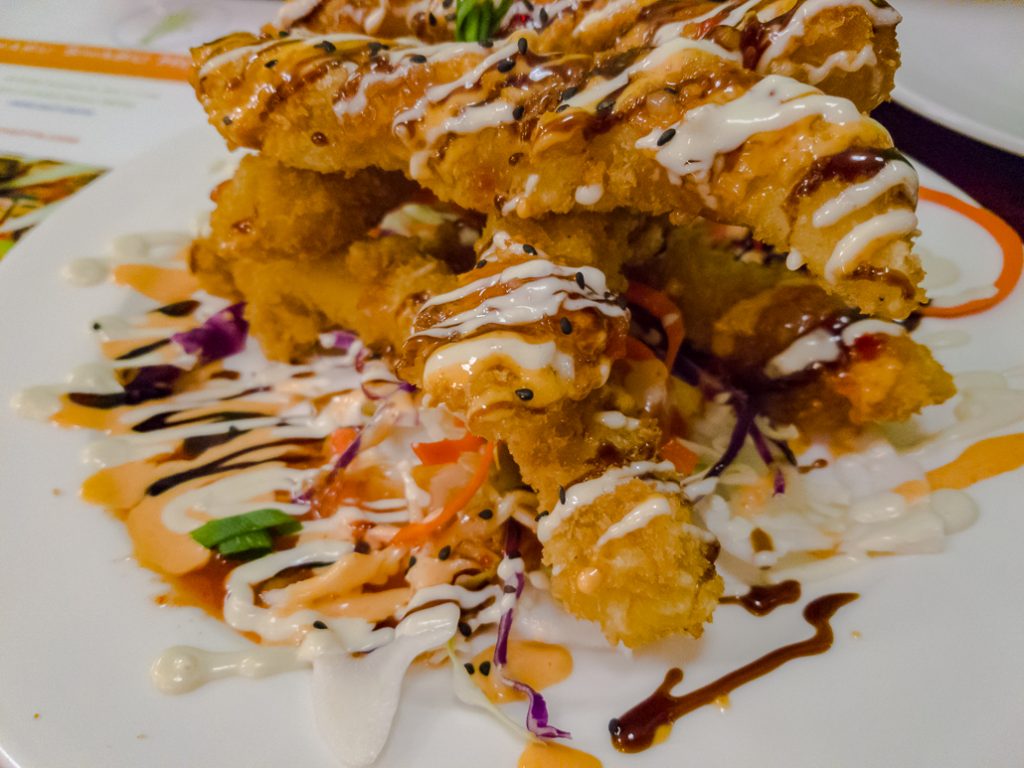
The appetizer came pretty quickly, a criss-crossing stack of six, large calamari steaks cut into Lincoln log shapes drizzled with two sauces; one soy reduction (on the sweet side) and one creamy – an aioli by any other name, all settled on a bed of raw shredded peppers, cabbage, onion, cilantro. Most of the sauces had landed on the upper tiers of the stack, so Steven got the bottom stacks. He isn’t a fan of anything mayonnaise – and we could tell the creamy sauce was definitely mayo-inspired.
We both thought that this would be enough for a light supper. Once again, looking discretely to our neighbors table, I saw they had not only plowed through the towering salad but we now energetically working on two huge bowls of soup. I really do mean huge, filled nearly to the top with liquid and then piles of fresh veg teetering, defying gravity. Priced between $14-19, they are a value for sure, but maybe too much a value? We’d find out.
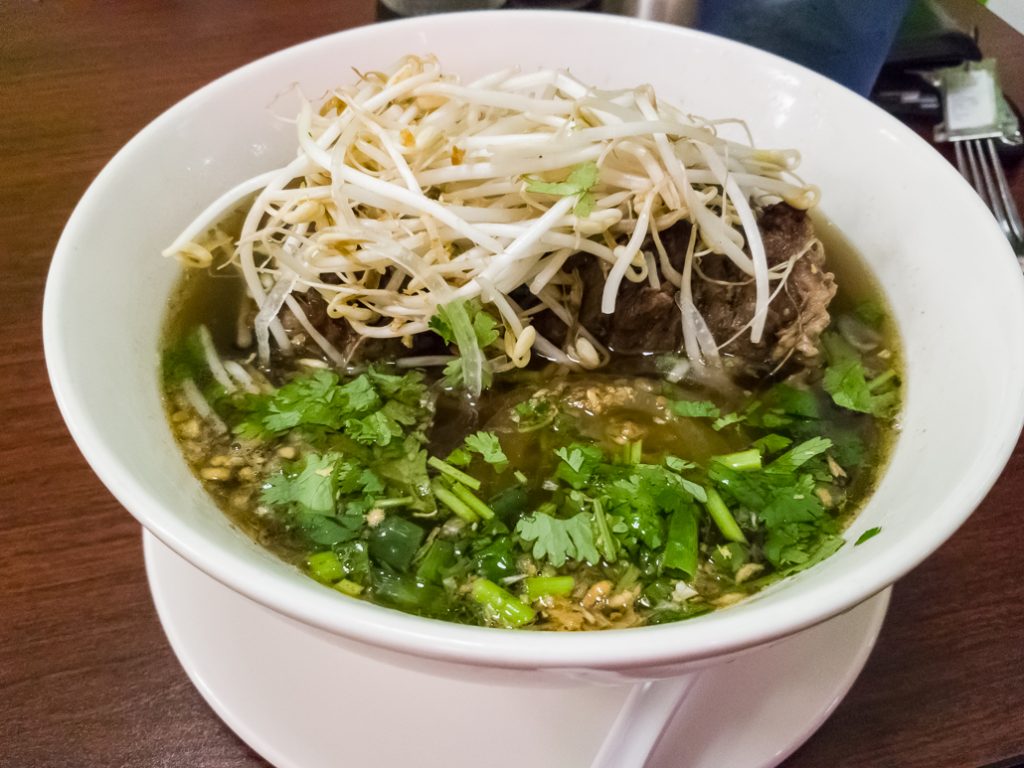
Steven’s soup came piled high with crunchy veg – a mixture of cilantro, bean sprouts, and sliced onions.
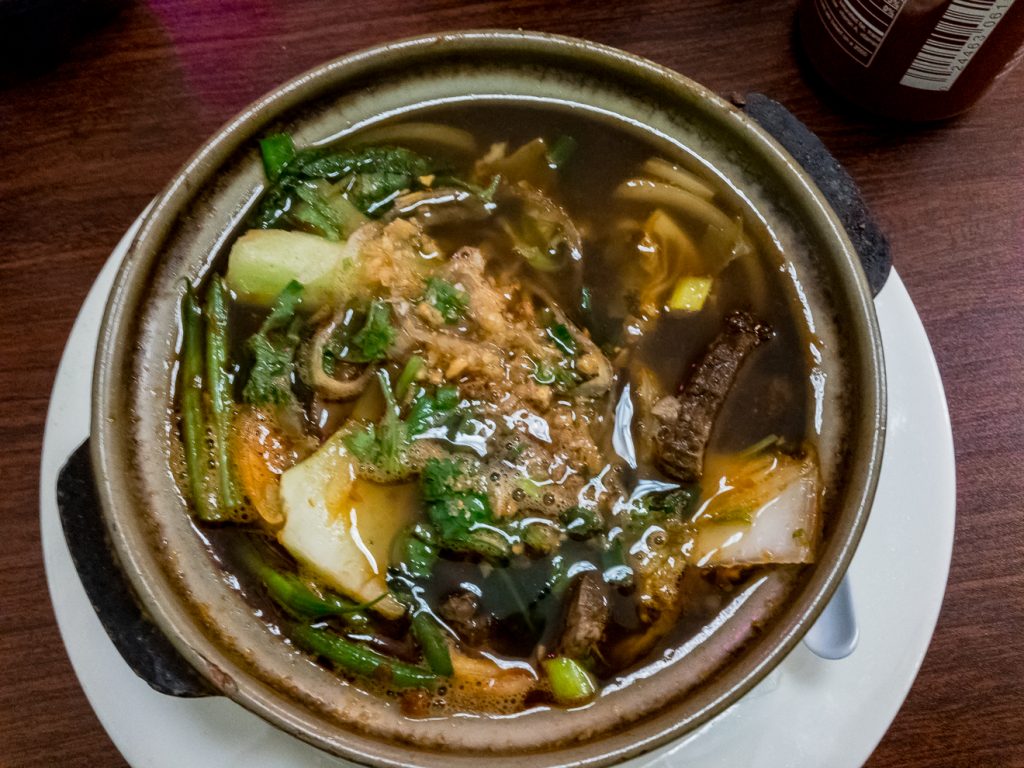
My hot pot was in a low-rise bowl steaming hot. I could feel the heat coming off the bowl as our server deftly placed the crock pot in front of me. I dared not touch. The flavor of the broth was more savory than Steven’s Oxtail Soup, not as much anise maybe? Nicely balanced flavors of ginger, garlic, beef and onion…to name only a few tastes. Besides being too hot to eat right away, the braised beef spare ribs could have benefited from cooking a bit longer before being plunged in the soup. The pieces of meat were a bit chewy – still flavorful though. My proof lies in how they became so succulent and tender after reheating them this morning for my breakfast.
Steven’s Oxtail Soup, like I said, had a broth much more like traditional Pho that emphasizes the ‘sweeter’ seasonings like anise, cardamom, and cinnamon. It was a little heavier on the anise than we typically have in Seattle but the rich beefy-ness was able to balance the anise just fine. Under the two good-sized oxtail sections, was a bed of rice noodles. The one down-side of this dish was the oxtails. Flavorful? Yes. Hard to get the meat off without getting soup everywhere? Again, yes.
One last tidbit about our dinner. We saw Matt Dillon sitting across from us with two others. We later heard he’s in town shooting a film and hanging out at the Sheraton in Keahou.
Related Images:
- 24
Sep 16

4
Pho Hai Yen
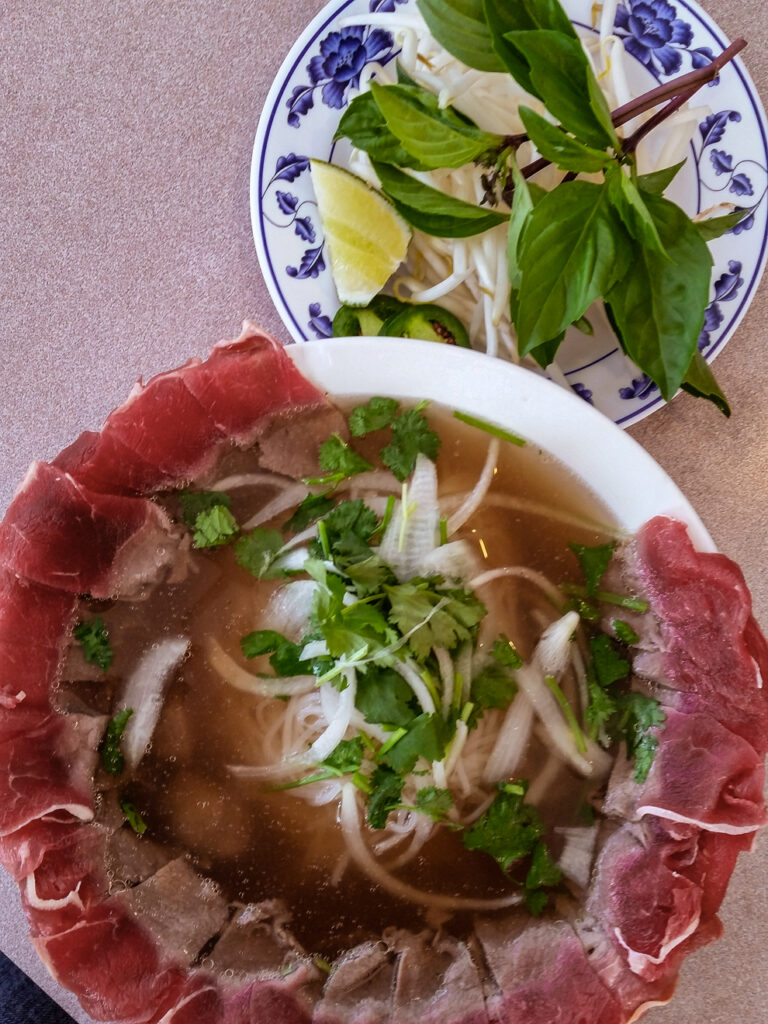
Category:Dining,FoodOur Favorite Pho Spot: Pho Hai Yen
810 Rainier Ave S, Seattle, Wa
We've been long remiss in writing up this place. We've been coming here habitually for the past 6?, 7? or is it 8 years now? Most Saturdays if were in town (sometimes Sunday) you'll find us here for lunch. Getting to know the family that owns and runs Pho Hai Yen has been just as much a joy as the Pho.
Seriously! This is the best pho broth we've found in town. Well balance and rich. Not over the top with the anise and clove or even the palm sugar. Many places we've tried, at least one of these is too much or all too little. Mom takes pride, and time, in making the broth herself. Not even the daughters who work here know the full recipe.
Nearly the whole family contributes in some way. Mom, of course, makes the broth and works mostly back-of-house on the weekends. Dad's also around during the week. We usually see the daughters, Tracy and Diane on the weekends. Grandmother is usually around as well helping out in the kitchen.
I can't say enough about the broth for the Pho. It's hard me for me at times to put in the obligatory peppers, basil, sprouts and lime and not just drink the broth. No secrets about the recipe are ever divulged other than it takes about 6 hours to make. The noodles aren't the dried rice noodles one typically gets at the supermarket. Rather, these are fresh noodles that you can only find in the refrigerated section of your local Asian grocery.
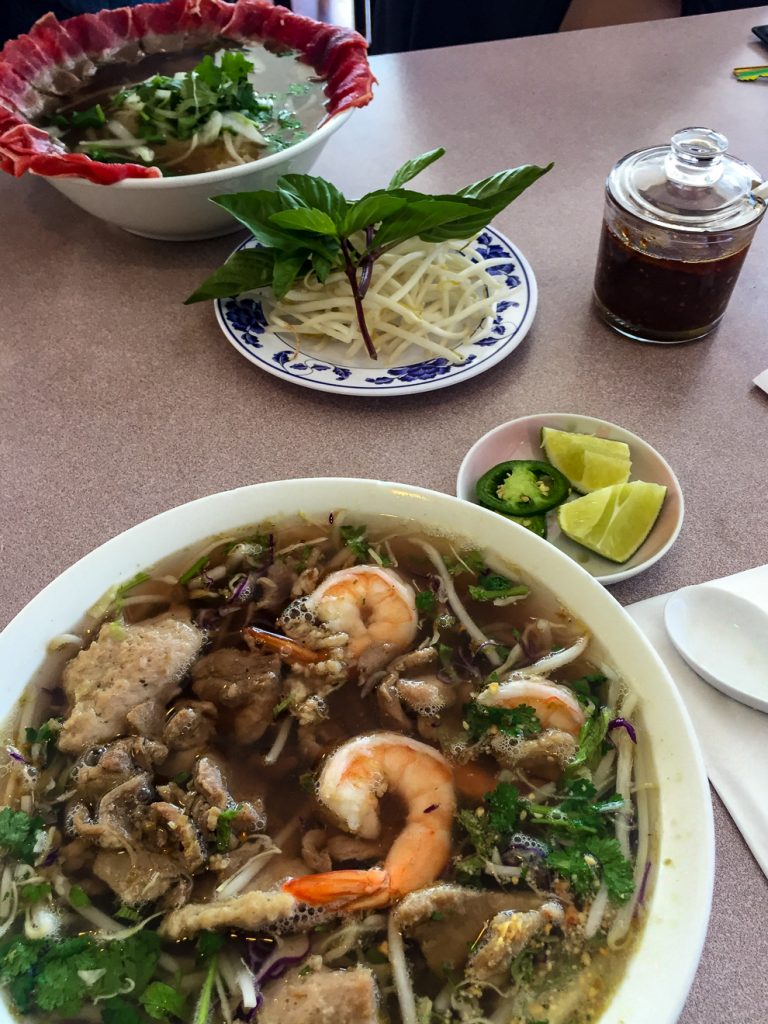
I typically get the basic Pho with steak and meatballs. When you order pho in most places with the rare beef, it is, of course, already in the broth which cooks it immediately. Here, they know to put the raw meat around the lip of the bowl so I can add it in as I eat and it's not instantly cooked through. Perhaps a little too carnivorous for many of you, but that's how I like it!
Kevin will mix it up from week to week. Some times he'll join me with the basics, but more often the #35, Spicy Seafood, no noodles, just extra vegetables. Kevin's not usually shy about spice, but the this, he has to ask to dial it back a bit.
One other item that's not on the menu but is on every table that we must tell you about is the chili pepper paste in oil. OMG, this is so good! Great flavor and really is truly spicy. We've begged them to bottle and sell this for take home. We have been known to take a little container of it home with us. Great condiment for many dishes at home. I even use it in making beef jerky.
Oh! I nearly forgot to mention the Fresh Rolls. These, too, are some of the best we've found. Shrimp, pork, rice noodles, lettuce, as you would expect and a crispy fried tofu pirouette in the middle. Of course, served with peanut sauce - don't forget to mix in some of the chili oil!
The menu does include a wide variety of other Vietnamese dishes as well as others from throughout Asia. There's something for everyone. Particularly popular are the assortment of bubble teas.
Whether dine in of take out, I'm sure you'll find something here to enjoy. Say "Hi" for us when you stop by.
Related Images:
- 02
Sep 16

1
La Sirena – New York
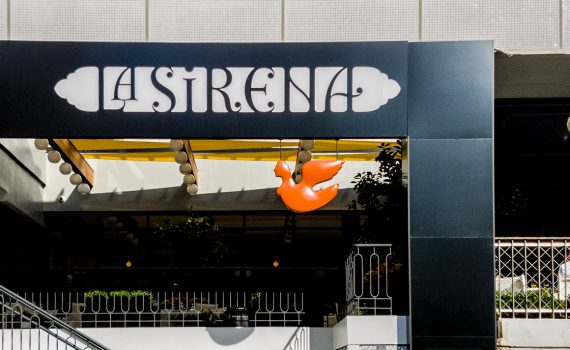
Category:Dining,Food,QM2 2016Dinner for our night in New York before once again boarding the Queen Mary 2 (see our last trip) was at La Sirena, a Mario Batali venture just in its 5th month. It’s a large, open space, so different than the current trend toward ‘micro’ restaurants. Of course, it’s a gamble to produce the high quality dishes typical out of a smaller kitchen, where attention to detail is a trademark.
We had an early seating, mostly due to wanting to have time for cocktails on the Viceroy’s The Roof terrace later and be ready for bed early.
The staff was prompt, generous with their time in explaining the menu. I questioned portion sizes because American pasta portions are just huge, and if you want a multi-course meal it’s just ridiculous to be served an Olive Garden-sized plate of noodles and then have room to enjoy an entrée.
Our waiter said the kitchen would create the meal as we wished. If we wanted to share antipasti and salad courses, but wanted to selfishly have our own Secundi and Primi courses, so be it…which is precisely what we did.
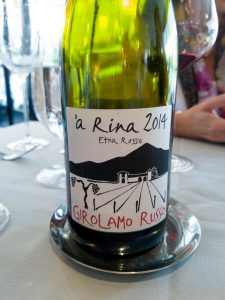
We weren’t in any hurry, so we asked the Sommelier, Michelle, to offer up suggestions for champagne to start us out. She suggested a wonderful Champagne from Bordeaux. It was just what we wanted at a good price too, given how restaurants mark up their liquor. We sipped and talked for quite awhile, the wait staff watching our pace from behind the scenes. Michelle needs a shout out here. She was not only knowledgeable, but kind enough to lead us to just the right red wine with dinner; ‘a Rina 2014 Etna Rosso Girolamo Russo, a Pinot Noir from Mt. Etna. Being from the Pacific Northwest, I wanted to particularly try a Pinot with the minerality forwarding the volcanic notes we’re used to. You could really taste the new earth of Mt. Etna but not in a slap ‘yo Mamma kind of way, but a robust, unashamed vintage.
Given all the various courses and combinations of proteins and sauces, this was no easy feat…but not a challenge for Michelle. She was just great on all accounts.
In short, the meal stood up to our strange ordering pattern and food requirements. This is what our table ordered:
Anitpasti
- Soft Shelled Crab with rossato and fresh herbs, two orders thank you very much
- Barrolo fresh mozzarella, English Pea purée
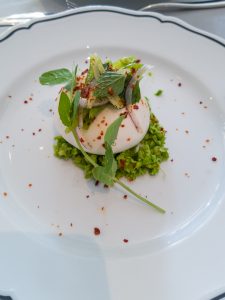 |
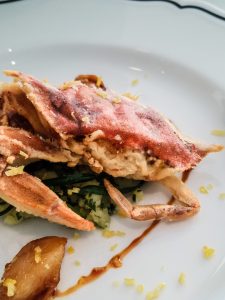 |
I am crazy for soft-shelled crab and cannot find it easily in Seattle. I guess the local purveyors and restaurateurs just haven’t caught on to the love of soft-shelled crab. Seattle is Dungeness land, so no surprise. Our server explained they were cooked in the traditional way, just dredged in seasoned flour and fried up. Perfection. No messing with it, straight forward and delicious. We had two orders of the crab and I think I ate most of them.
Salad
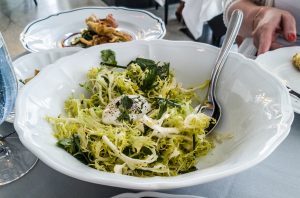
- Frisée Salad with soft poached egg, pepperoni lardon and potato
Primi
- Tortellini stuffed with cheeses, in a brown butter gremolatta
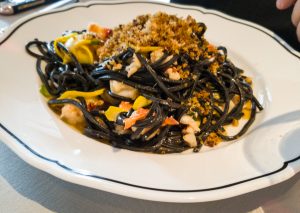
- Black Squid ink pasta with local lobster (NO one touch my pasta course!…okay, I did share, but just a little)
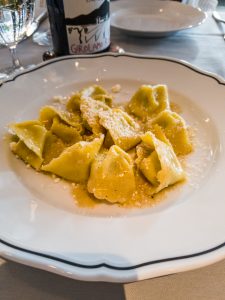 |
 |
Secundi
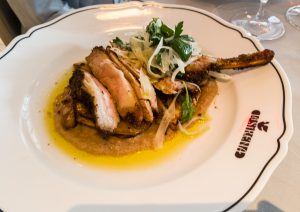
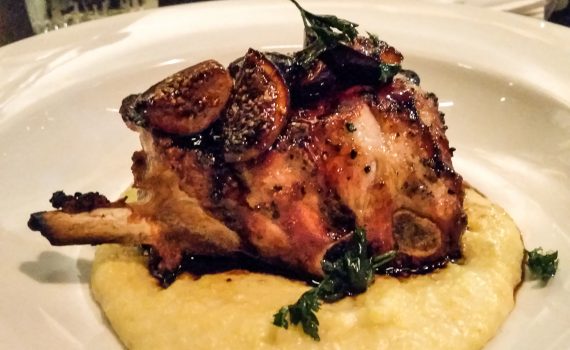
- Pork Loin Chop, rib-in, garbanzo purée and shaved fennel
Dolce
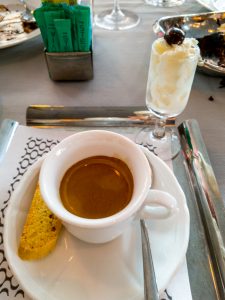
- Chocolate Brownie with wonderful Grenache and soft ice cream
- Doppio Espresso and Americano finished out our meal.
Related Images:
- 21
Aug 16

2
Orfeo
Category:Dining,FoodIt's been a while since we've been to Orfeo but we wanted to finally get around to writing up about it. We've enjoyed the food here immensely and the staff has all been more than welcoming.
First, Orfeo is located in Seattle's Belltown neighborhood at 3rd Ave at Blanchard (2107 3rd Ave, to be precise). They're open daily from 4-10PM with Happy Hour from 4-6PM. This is the old Brassa location.
The claim-to-fame here is their wood fired oven and charcoal grill. Much of the menu is centered with a focus on Italian dishes. The wood fired pizza is to die for! More on that later.
Our first foray in Orfeo was with our friends Todd and Mark just after they first opened. I'm sure it's not the case, but it seemed like we had just about everything on the menu - from the Charcoal Grilled Octopus to the Seared Scallops Alla Puttanseca and the Pork Chops with Foie Gras Butter. We really could hardly stop ourselves from ordering more right down to the molten chocolate cake with cherries and the house made sugar donuts.
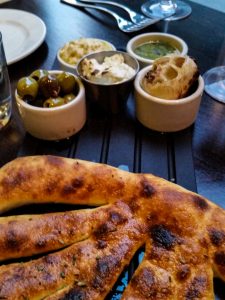 |
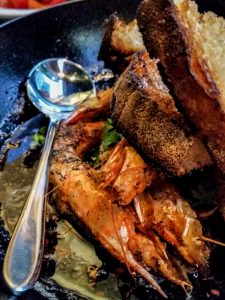 |
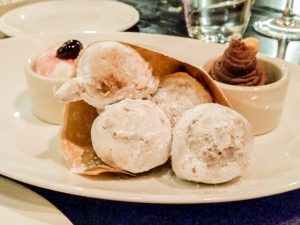 |
|
Our next time in was several months (a year?) later when we got an email about their wood fired oven. Apparently, Chef Davis, has devoted many hours to perfecting, of all things, wood fired pizza. How could we resist?
Kevin emailed me: "Hey Steven, let's go for Happy Hour and get some pizza!" What a treat. Great crust, pepperoni cut just thick enough to become little cups of pepperoni "juice." And a sauce that's not too sweet, not too tart. Of course, we had to have some oysters on the half shell while we waited for the pizza. And great conversation with the bartender.
Our last trip to Orfeo was once again for happy hour. This time we enjoyed some clams from the wood oven then shared the Pittsburgh Style New York Strip with garlic butter mushrooms.
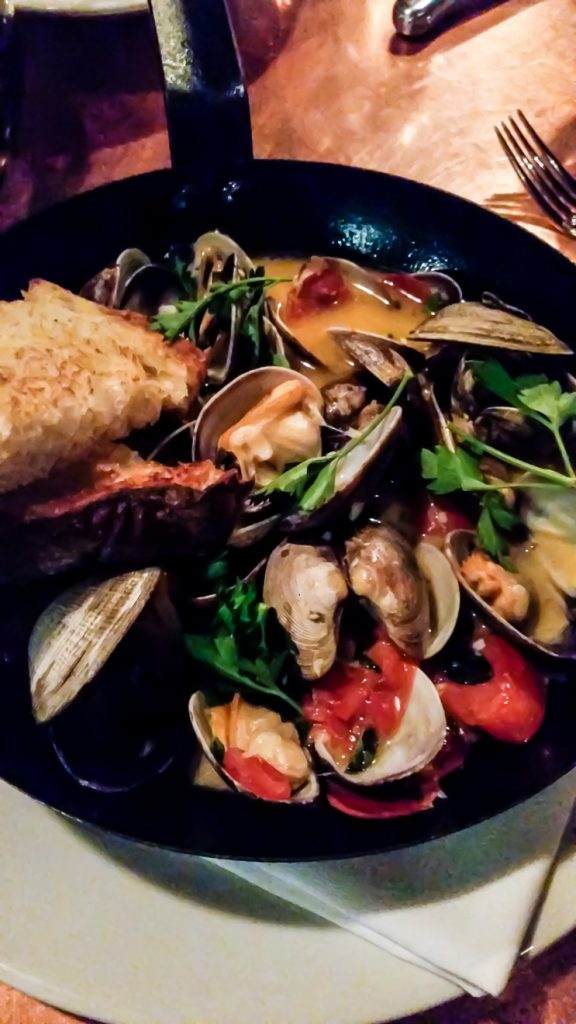 |
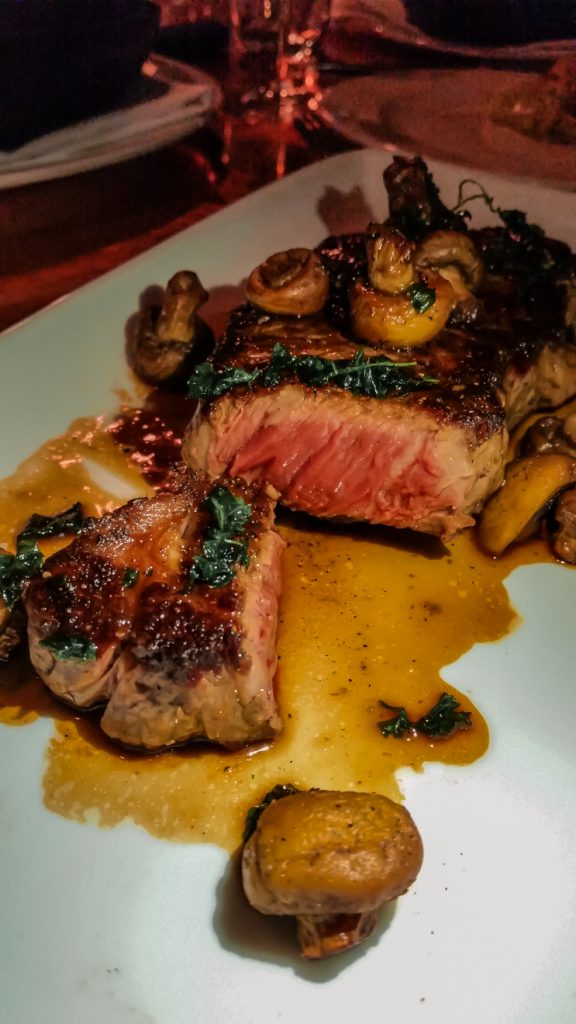 |
A little bit of background - Orfeo is owned by the husband and wife team, Kevin and Terresa Davis. Check out their other places in downtown Seattle: Steelhead Diner in Pike Place and Blueacre Seafood in Downtown. Both are excellent places for "standard" and "unique" seafood respectively. Steelhead also makes a darn good burger.
Once you make a reservation through their website, you'll begin receiving emails announcing their weekly specials. They offer up some truly amazing original dishes.
Perhaps you'll find us at the bar for happy hour some time soon.
Related Images:
- 07
Jun 16

2
Easy Asian-Inspired Pickled Cucumbers
Category:FoodI’m a lover of pickled vegetables. All pickling starts with the same process: create a brine, cut vegetables in the shape you want, pack into jars or containers and wait a few hours or a few days. Oddly, I’m not a fan of olives, which are also brined, but that is another story.
The balancing of salt, vinegar (acid), and sweet is as varied as there are home and professional cooks. This basic, easy recipe on pickling cucumbers has been altered to suit my tastes. Below is Teri’s original list of ingredients. After, I’ve added my changes.
Food52 Take Off of Quick Cucumber and Shiso Pickles, by Teri
(https://food52.com/recipes/4891-quick-cucumber-and-shiso-picklesf)
1/4 cup sugar
1/2 cup apple cider vinegar
3 tablespoons mirin
1 tablespoon salt, preferrably sea or kosher
5 Japanese cucumbers, or 2 English cucumbers
8 shiso leaves (or substitute basil)
Kevin’s Basic Asian-Inspired Pickled Cucumbers
1/4 cup white sugar, though palm sugar could be used, but you have to grate it or buy it that way
3/4 cup apple cider vinegar
1/2 cup mirin (Sweet Japanese Rice Wine)
2 tablespoons salt, I used kosher salt because it resolves easily
1 large Japanese cucumber
1 medium zucchini
4 small carrots
3 stalks of Thai basil
- Mix the first five ingredients in a glass bowl, or some non-reactive bowl. Stir until sugar and salt are dissolved.
- Slice cucumbers and zucchini in whatever shapes you like. I made discs of the cucumber and zucchini. Keep them thin. Use a mandolin if you have one.
- Peel and quarter the small carrot, cutting them to the right length to fit in your container.
- Remove the basil from the stalks, saving the purple flower heads if you have them. Since Thai basil can have smaller leaves than typical basil, you don’t have to chiffonade them.
- Place the vegetables in your container or split even among two or three, depending on the size you want to store.
- Add basil to brine and stir.
- Pour into a glass measuring cup, then pour over your vegetables.
- If you need, take a chopstick and push down the basil deep into the containers to evenly spread them.
**Option: crush one glove of garlic and break up evenly between containers.
Seal up the containers and refrigerate for at least 4 hours, preferably overnight. Use as condiments for burgers, rice dishes, or grilled meats such as hotdogs! Be creative. These are fast and wonderful. Thanks to Food52 and Teri for the inspiration.
Related Images:
- 29
Mar 16

5
Weeknight Dinner – Scallops with Pasta
Category:FoodSometimes good thing happen with Kevin goes to the grocery store on his own. On Sunday he came back with not only King Crab Legs which we steamed and devoured for lunch on Easter Sunday, but he also picked up some nice sea scallops. Tonight we had them for dinner.
Yes, they're a little pricey and most of us only have them at a restaurant. I have to think that part of the reason many people don't cook them at home is that they're a little intimidated by them. They're actually pretty easy to cook, it's just that they're also easy to overcook. But with some high heat, a good pan, and attention, anyone can make a delicious scallop dinner.
Here's how Kevin did this tonight. It only took about 40 minutes. The longest stages were boiling the pasta and reducing the shallot and wine base - more about that in a minute.
He used dry pasta tonight so he got it going first. If it had been fresh pasta (never hurts to have fresh pasta!) this would have been done nearly last minute. While that was going he got all the rest of the ingredients in place. Chopped shallot, chopped garlic (from a jar), stripped thyme leaves from their stems. Meanwhile I grated a couple of hard cheese - parmigiano reggiano and asiago.
To prepare the scallops, the tops and bottom were coated with a bit of cornstarch then lightly salted. These then went into the eight inch skillet on medium high heat (coated with a tablespoon or two of olive oil, enough to coat the bottom of the pan) and a couple of teaspoons of butter ( NO! not margarine). You need a high enough heat to sear and brown the scallops, but not so high they'll burn. Once properly seared, take them out and set aside. They should not be cooked completely through at this point - they'll be finished later, trust me.
Next into the pan are the shallots, garlic,and thyme. Sauté until softened then add about 1/2 cup of white wine. Our choice of wine tonight is a chardonnay: 2012 Enlightenment from Sparkman Cellars. Reduce until about a tablespoon of liquid was left.
Add cream (actually leftover cream thyme from Sunday's scalloped potatoes) and about a teaspoon of grocery store lobster base. Reduce again just until slightly thickened. Then add a cup of the starch water from the boiled pasta, let it come back together - "tighten up" if you will. Check your seasonings, salt and pepper, to taste at this point. Now add the scallops back into the pan to finish cooking - up to this point, remember, they were only seared, but not cooked through.
Now toss in your pasta, directly from the boiling pot to the pan along with the asparagus tips that were cooked with the pasta (did I mention the asparagus tips?). Toss to combine, season as needed with a little fresh ground pepper and most of the grated cheese.
Now to the plate, or should I say pasta bowl.
Garnish with the remaining grated cheeses and a sprinkle of fresh thyme and to be decadent add a drizzle of the EVOO.
Buon Appetito!
Related Images:
- 27
Mar 16

3
Vancouver International Wine Festival – Vintners Brunch
Category:Drinks,Food Tags : British Columbia Food Pairing Vancouver Wine Wine Festival Wine TastingSunday, the last day of the Vancouver Wine Festival. The highlight of the day, for us any way, is the Vintners Brunch. This event consists of 2 1/2 hours to make it through about 16 food courses, each with a wine pairing. The wines were from around the world, with concentration on Italy since it was the country focus this year. All the food was from various Vancouver Restaurants. Each course was just a small tapas-sized bites or canapé and even a few cups of soup so you would think it not a difficult task. But in the end we found ourselves rushing to get the last few items before they were gone and the event over. We managed to make it through, just barely.
We were greeted at the door with a glass of sparkling brut from Okanogan Valley, British Columbia by See Ya Later Ranch. A nice, refreshing way to start as we found our table and caught up with Pam and our other friends, Ken & Victoria, Van & Marcella, Justin & Elena, Matthew & Reema. Once oriented, we were off to our first course. In the interest of brevity, I'll only mention some of the highlights.
The first up was a Warm Fresh Cheese, Carrot, Egg Yolk, Brioche from Latab Food (who has since closed) paired with a Valdo Marca Oro Prosecco do Valdobbiadene DOCG NV. This was a light but yet rich dish with the warm and a sous vide egg yolk, but the prosecco cut through and lightened up each bite. Kevin and I both thought it could use a little more seasoning, but overall, it was a good breakfast started that paired well with this processo.
Next up was a Dungeness Crab Salad with Grapefruit, Vanilla & Hollandaise paired with a Geyser Peak Sauvignon Blanc 2014. This was the big surprise for me! I don't generally care that much for Geyser Peak wines and typically ignore them when wine shopping. But this with the crab and grapefruit worked really well together. We probably wouldn't buy this just for sipping, but if serving these flavors, it may be worth consideration. And it was a really good crag cake from Showcase Restaurant and Bar - may have to check them out next time in Vancouver.
I didn't try the next one, but Kevin did and really liked it, this was Nikkei Ceviche. Ceviche has never been one of my favorites, but I trust Kevin's opinion. It was paired with a Columbia Winery Chardonnay 2013. Kevin called this an "amazing pairing, food off the hook. The buttery chardonnay balances the pungent nori and crisps." The program describes this wine as offering aromas of pear, apple and tropical fruits. Expect this wine to pair nicely with other light seafood such as Dungeness crab or mussels.
Skipping ahead a bit to one of my favorites, the Ebi-Shinjo Shrimp and Fish Ball with Dashi Espuma (miso foam) with Julienned Beets, Radish, Green Onion & Ginger from the sake bar and Japanese bistro, ShuRaku. The sweet-savory shrimp and fish ball along with the spiciness of the vegetables paired nicely with the Thornhaven Estates Gewurztraminer VQA 2014.
Here's what Kevin had in his tasting notes:
"Wine stands up and highlights the dish. Not normally a fan of Gewurztraminer - good pairing that softens the radish. Alone it has a good mouth-feel."
This dish by-the-way took second place with the judges for today's brunch.
And now for something less complicated. This is something that anyone can throw together for your guests before dinner - Fig and Goat Cheese Tart with Carmalized Onion, Dried Fig & Farmhouse Cheese's Goat Cheese. This was offered by Savoury Chef Foods, the wine chosen to go with if was the Sandhill Rosé 2014. The write-up on the program had this to say about it:
...made from Cabernet Franc, Gamay Noir, Sangiovese and Barbera grapes. A special yeast for fruity white wines was used to help capture flavours of juicy strawberries and raspberries...
Next up was one of Kevin's favorite, Spiced & Braised Lamb, Gribiche Sauce, Olive Oil Crouton, Sumac Salt from Blackbird Public House. Served with our first red of the day, Delicato Family Vineyard Black Stallion Los Carneros Pinot Noir 2013. No picture of this unfortunately but our notes say "Amazing dish! A full bite work on every level - peppery greens! Color of the pinot edges towards a bit brown, but taste is solid."
We're not done yet! Railtown Catering has offered up the dish that took first place in the food judging today. The name is a bit long so bare with me - Black Rice Congee with Red Wine-Braised Duck, Soy-marinated Quail's Egg, Black Currant Grastique, Togarashi Crackling.
I don't know what else I can say beyond that to describe it but I do have to say it was, in my opinion, the most interesting dish served today. It was paired nicely with a 2013 Hahn Family Wines Santa Lucia Highlands Pinot Noir. The black currant aromas in the wine helped bring out the black currant in the dish - well played! The crew preparing the food looked like they were having as much fun as we were.
I had decided to wear my Scottish Kilt to today's event. I don't get much opportunity to pull it out of the closet, but this was a special occasion, so why not? It turned out to be a great conversation starter. One nice lady who caught me a couple times insisted that I try the Scotch Egg - or more fully, the Chorizo Scotch Egg with Urban Digs Pork, Smoked Paprika, Hen's Egg and Hay Aioli from ARC at Fairmont Waterfront paired with 2013 Gil Family Estates Tridente Tempranillo - Castilla Y Leon. The tempranillo was a good choice for this as it balances and cuts through the richness of the egg and the deep fried pork. If I could have my eggs this way every morning, I'd be happy - though I think I would need to start taking cholesterol meds.
Several desserts had been on offer. By the time we got there far, they were beginning to run out. We were lucky enough to get the Sable Breton with Salted Carmel, Spiced Okanagan Apples, Tainori Grand Cru Chocolate Cream and Nutty Tuile. from the Vancouver Convention Center's own kitchens. This was paired with Fonseca Guimaraens 10 Year Old Tawny Port. A perfect combination to end a fabulous food and wine experience.
We had arranged for a late check-out from the hotel and our time was running out to get back, finish packing and check-out. So we weren't able to stick around for the music and dancing. The small group had been playing a range of music all through the event. As people finished their tastings, they began to dance. Looks like it could have been fun, but for us, it was time to go.
We had a great time and a big "Thank you!" to Pam and Marcella for getting us involved and helping us get all our ticket. Next year's festival will be focused on Canadian wines. We look forward to being back.
Salut!
Related Images:
- 20
Mar 16

4
Corky’s Egg Casserole
Category:FoodYour family probably has a version of this egg casserole. I first came across this treat from my almost-cousin Jerry’s Mom, Corky (Jerry’s aunt was married to my Dad’s brother). I and a couple of friends of Jerry’s went over to his house one weekend and Corky made us the cheese, bread, egg and sausage casserole that inspired this one. She served her’s with cheese sauce over thick portions. I’ll take the corner piece with the most crispy edges, please. Thanks Corky.
My version is a Pantry Version, meaning, I just grabbed things on-hand to add to the basic custard and bread base. Today, I pulled out Hot Bulk Italian Sausage, Anaheim Pepper, Red Pepper, a local Jalapeño & Cheddar Cheese from Hunter & Holden’s, and a chunk of sturdy day-old rustic French Baguette – ours is from another local maker, called Grand Central Bakery.
The Basic Elements
- Custard: Egg and whole milk (or cream if you’re living on the edge).
- Structure: Provided by day old bread. Corky’s version was made with Wonder Bread, mine is includes day old crusty French bread.
- Flavoring: What ever you like. A word of caution, cook all ingredients and let them cool BEFORE adding them to the custard. For instance, uncooked mushrooms will exude all their water while in the oven and make for a soupy, grey casserole. Not pretty.
Heat oven to 350 F
Custard
- Six whole eggs
- 1 cup milk or cream
- Salt & Pepper to taste – this is where you could take the casserole in any direction you want. Add Herbs de Provence for instance for that south-of-France flair, or Cilantro and Cumin a Mexican spin. Get creative.
Whisk together thoroughly.
Structure
- Cut up your bread of choice into no larger than 1” cubes. If you need, you can always dry the cubes out in a low temperature oven (250 F) for 30 minutes.
- Add to Custard and mix to combine making sure to push down the bread.
- Let stand for at least 30 minutes to allow the custard to get into the stale bread.
Flavoring
Pantry and crisper ingredients of your choice
- ¼ Anaheim Pepper, chopped medium fine
- ¼ Red Pepper, chopped medium fine
- 4 oz white mushrooms, chopped medium fine
- 2 oz Hot Italian Sausage
- 2 oz prepared Cheddar Cheese spread (I almost never do this, but since this was a local produce…and I love supporting local ventures, this makes it in)
Left overs
- Roasted potatoes – use as much as you like, just remember to cut all ingredients to the same size.
Make sure to pre-cook the veg and meats. In my case I’m using hot Italian Sausage, mushrooms, red pepper, and Anaheim peppers.
- Combine all ingredients. It will look like a mess, that’s how it’s supposed to look.
- Pour into a greased pan of choice – I used a square Emile Henry baking dish.
- Dot with butter if you like.

- Bake for 50 minutes, checking for doneness about 30 minutes in to the cooking process. Cooking time depends on the depth of the custard.
Remove from oven when the custard is set and let rest for 5-10 minutes. Don’t over cook, some softness is desired (at least by me).
To Serve
If you’re serving a crowd, just put it out as is, with what ever other condiments or additions, like muffins, you want.
We just take our preferred slice and have at it.
We, of course, had some when it was fresh out of the oven! But once it cooled, we cut into "snack-sized" squares and individually wrapped each in plastic wrap. This may them easy and accessible for a little breakfast to take to work throughout the week. - What could be wrong with that?
Related Images:
- 18
Mar 16

1
Duck Fat Saturday Dinner
Category:FoodWhat to do with a quart of Duck Fat without really trying.
For this Saturday dinner we needed something pretty easy – meaning something we’ve already cooked before with success. I was at a conference most of the day and Steven had rowing practice then errands to run. Before he left, Steven had set out a couple of organic chicken breasts from the freezer to thaw for me to brine when I got home. Other than that, anything was fare game.
The backstory to having duck fat on hand isn’t that interesting. It involved going to our favorite seafood shop called Taylor Shellfish in the Melrose Market on Capital Hill, Seattle’s trendy – though quickly gentrifying – post-queer neighborhood where we picked up a dozen fresh oysters, clams and mussels (see our cioppino post coming soon). In the same complex is Rainbow Meats, another great destination for all things meat. Since that night we were making a riff off the traditional Italian fish stew, we needed some spicy sausages. Rainbow has it all. You’ve got to go if just to ogle the fine meats…and staff. Anyway, I saw they had prepared duck confit. An idea sprang into my brain….I wondered if they have duck fat so I can make confit myself? Of course they did and we left with a full quart of that tantalizing fat. Score!
The duck fat sat in the fridge for a few days taunting me every time I opened the door, challenging me to find some uses for it…..I didn’t have duck, so what to do with it until I did?
Here’s what I decided:
- Porchetta-style Baked Chicken Breasts
- Duck fat roasted new potatoes with rosemary and white pepper
- Romesco sans almonds
Saturday Evening Porchetta-style Baked Chicken Breasts
- Split a single, brined breast without cutting it entirely in half. I recommend starting at the skinny end with one hand holding the breast in place, tilting your hand slightly away from the blade. Take your sharp knife parallel to the cutting surface and slowly slice through the breast to about ½ in from the fattest edge and fold open like a book.
- Pound the breast to an even thickness of ¼ inch. I always put a big old piece of plastic wrap over the meat to prevent the kitchen being splattered with flying bits of chicken.
- Optional: marinate for one hour.
- ½ cup dry white wine – 2012 Oriana by Brian Carter Cellars in this case
- ¼ cup honey
- 2 tablespoons finely chopped fresh rosemary or 1 teaspoon dried
- Salt/pepper (not much salt needed as the breasts are already brined)
- Mix and pour over the chicken, sealing it up on a gallon sized freezer plastic bag is very convenient
- After about an hour, take out the breasts and dry off excess liquid.
- Pancetta substitute: I used enough bulk spicy sausage to have a nice layer on top of each breast. The sausage didn’t really need further seasoning, but I added fresh crushed coriander, finely minced basil, garlic, and dried Aleppo chili’s I had in the fridge. Feel free to improvise!
- Prep and set back in the fridge until you need them.
Duck fat roasted new potatoes
From our organic grocery delivery bag we had LOTS of potatoes to use, naturally a roasted potato would go well with the chicken.
- Preheat oven to 400F.
- Cut up the potatoes into even ½ inch squared chunks. For the two of us I used three medium red potatoes. We had left overs.
- Melt 3-4 tablespoons duck fat in the microwave, low power. High power might seem like the right thing to do but resist the temptation otherwise you might have small explosions as the water in the fat expands under the power. Messy.
- Toss the melted fat with the potato adding your favorite seasonings. I this case in keeping with the Mediterranean theme, I picked more Rosemary (2 teaspoons), crushed coriander (1/4 teaspoon), salt and pepper.
- Spread out evenly on a baking sheet, pop in oven for 30 minutes. HINT: Watch the potatoes, turning them frequently after 10 min. To prevent sticking, heat the pan up in the oven for 10 minutes before adding the potatoes.
Romesco Sans Almonds
Probably one of the easiest sides you can do with pantry items. Maybe not traditional, but good home cooking isn’t about replication but innovation. If you Google Romesco sauce you’ll see it originated in Spain most likely, and they all have ground nuts and/or bread. We neither like the mouthfeel of ground nuts nor appreciate the thickness bread gives this sauce. So, maybe what I have here really isn’t Romesco at all…but Seattle-style Romesco???? You decide.
- 2 tablespoons duck fat into a sauté pan on medium heat. Used instead of the traditional olive oil….I can hear the protests now.
- Chop fresh red pepper (or yellow or green for that matter) into ½ inch pieces.
- Chop roasted red pepper, maybe just one big piece from the jar.
- 1 tablespoon Aleppo pepper (use what you like here, these were in the fridge)
- 1 tablespoon finely minced fresh rosemary.
- ½ large shallot minced.
- Sweat the above in the simmering duck fat, being careful when putting them in as any water will cause some spattering.
- Add 2 teaspoons minced garlic and sauté 1 minute – we use Christopher Ranch brand because it’s easy to find in the grocery store, but feel free to use cloves of course.
- Add 1 can dices tomato (with liquid if you want a thinner sauce) and spices to link with the others you’ve chosen for the chicken and potatoes. Just pick one main one to repeat. In this case I used the crushed coriander as my bridge spice.
- Scant teaspoon red wine vinegar and sugar.
- Season to your taste.
Cook away until you get the consistency you want. I prefer a looser sauce, hence no bread or nuts.
While the sauce is combining and reducing and the potatoes are happy in the oven (don’t forget to check on them and give them a turn), pull out the chicken from the fridge and put in a baking dish or sheet pan that you have coated with….you guessed, duck fat. Pop into the 400F oven on a lower rack. Let this go for about 20 minutes only. The sausage spread on top will keep the breasts from drying out, but as you’ll have one final stage of cooking left at the very end, you don’t want some leathery plank of protein on your hands.
Staging for the final cook
Pull out the cooked breasts from the oven. Take a small amount of the improvised Romesco and schemer on the top of each breast if serving more than two people. It turned out that the chicken breasts were plenty large and we split just one, tucking the remaining cooked breast in the fridge for another meal.
Add a little shredded cheese on top and place under broiler for just a few minutes. We used some mozzarella and grated Parmigiano-Reggiano …the undisputed king of cheeses according to Mario Batali.
Plating
As you can see, we used the Romesco to one side and potatoes on the other, placing the piping hot-from-the-oven chicken on top the potato. A little fresh basil, and maybe to guild the Lilly, add a drizzle of EVOO and fresh cracked pepper.
NOTE: It took about as long to write this posting as it did to make this dinner!!!
I hope you enjoy.
Caio Bella, Kevin
Related Images:
- 27
Feb 16

4
Vancouver International Wine Festival – Taste Italia!
Category:Drinks,Food Tags : British Columbia Vancouver Wine Wine Festival Wine TastingTaste Italia!
Saturday, Feb. 27, 2016
Noon-2pm – Taste Italia!
As the Italian’s say, a meal isn’t a meal without wine. Nothing could be closer to the truth than this.
This event is was a must for the festival. Today's Taste Italia! lunch, as you can imagine, is a celebration of the wines of Italy We got there about 30 minutes before the start on the advice of Pam. She was right. We were among the very first there, and started the queue that would stretch out of sight and around a corner of Level 3 of the Vancouver Convention Center West by time they open the gates to let in the throng.
The convention center is really a jewel. We topped the escalator and stepped into a panoramic view to the north, appropriately called North Vancouver. Five of us descended on the ballroom and adroitly took a prime bar-style seating area all to ourselves.
The layout put the wine makers, 60 in all, around the outside with the amazing food offerings pretty much in the center – a great arrangement that encouraged us to get some food, enjoy some wine, then get up and move about the hall as we wanted. Food was always just a few meandering curves away.
After all the food and drink, everyone was feeling pretty happy!
One of the most helpful additions to the tasting was a big map of Italy with the wine growing regions clearly displayed. For those of us unfamiliar with Italy’s vast wine growing history, this map is a good place to start. Silly me, but I would have thought Roma was in the Emilia Romagna region...but no, it’s really in Lazio where some fine Sangiovese wines are grown. Look over the map below. I learned a lot.
The food tastings at Taste Italia! were all well-executed, even though you couldn’t really say they were ‘Italian’ per se, but in leaning. Okay, so there was the obligatory assorted focacce and oh-so-yesterday prosciutto e melone that even Midwesterners would recognize (apologies to my birth heritage). A few standouts were the Prosciutto-wrapped tuna, clams, fennel, and olives, the Beef short rib brasato lasagna, alfredo gratinee, and the Wild mushroom risotto. All in all, a big boo-ya to Executive Chef, Blair Rasmussen of the Vancouver Convention Center.
Now to the wine highlights.
We passed up the various Prosecco’s and went straight to the whites. Of particular note was Casetta Winery’s Mumplin, Roero Arneis DOCG 2013, which paired wonderfully with what amounted to our first courses – Wild Prawn in saffron emulsion, Proscuitto e melone, and Mini Zuppa di pesce “Cacciucco” in tomato Vermouth broth.
Thought by many to be the queen (or prince) of Italian white wine grapes, this particular Arneis is an example of intense elegance, a wine that is full-bodied, liquid yellow in color, and can stand up to fish, tomato-based soups, and even melon – not an easy feat I know from experience. It is a value by anyone’s estimation at about $17 a bottle. Unfortunately, by time we got to the convention wine store, this wine was sold out completely.
Spotlight Casetta Winery/Piedmont
Web resources
http://flli-casetta.it/en/vini/mumplin-roero-arneis-d-o-c-g/
http://www.wine-searcher.com/wine-260192-0001-casetta-mumplin-roero-arneis-docg-italy
US distributor, unknown. From Canada, http://boushelong.com/en/
Price: $23.83 CAD about $17 USD.
Next door to Casetta was another Piedmont wine, ‘Il Fiore’ Langhe Bianco DOC 2013 produced by Briada Di Bologna Giacomo. We had the chance to speak to Principle, Norbert Reinisch, which is always a treat at these events. Mr. Reinisch described their approach to growing the wines we tasted, including a very fruity Barbera d’Asti DOCG 2013. The bianco differed from the Arneis. Wine Searcher refers to this as an example of a Rare White Blend, a wine that includes various whites, but most often centering in on one key characteristic, such as dryness. I found the bianco a little ‘light’ compared to the full Arneis, though it too stood up well to our first course.
Our final Peidmont tasing was the Lecinquevigne Barolo DOCG 2011. We paired the Barolo with the Beef short rib lasagna and fennel sausage, chicken and green lentil misto. This is one of those special wines that you want to search out and drink up...slowly. You won’t want to loose one sip of this luscious, fruity, soft red. Reviewed any where from 88 points to 92 points by the Wine Spectator and Wine Enthusiast respectively, this wine is drinkable now but would lay down well for a few more years. Borolo’s are generally known to be big and fruity with cherry, pepper, and licorice overtones, this one was no exception.
From the Puglia region, we tasted the Tormaresca Trentangeli Rosso Castel del Monte DOC 2013 ($14.60 CAD) and the Torcicoda Primitivo Salento IGT 2013 ($20.43 CAD). According to the pourer, 2013 was a good, no, very good year for the Aglianico, Cabernet Sauvignon, and Syrah, which comprise the Rosso. Not having much to compare this wine to, it was smooth, without any of the harshness you sometimes get with a relatively new red. The Torcicoda had the same smooth character and I imagined it would make a great addition to our cellar.
Much to our disappointment, the festival wine store was already sold out of this Tormaresca. Instead, they had just six bottles of the 2013 Neprica Puglia IGT at $10 USD, we took them all off their hands. One bottle already drunk, we loved it for its unassuming character and playful notes of cherry.
A New Italian Renaissance?
Both of these wines – indeed many of those we tasted - are part of a new era in Italian wine making according to the principles and sellers at the festival. Italy is witnessing a development that seeks to bring back native vines and enter them into relation with notable European stock, such as the Cabernet and Syrah.
A quick search for this wine on the web lead me to this statement:
The production of high quality wines is related to recent steps towards innovation and creativity: substantial changes have been obtained through the use of modern viticulture techniques and the introduction of non native grape varieties (i.e. Chardonnay and Cabernet) that express themselves in this ”terroir” in a completely unique way. Tormaresca is the expression of the above two souls. Character, personality and top quality are the characteristics that Puglia transmits to the native grape varieties. For this reason the Antinori family gave birth to Tormaresca in 1998 when they started investing in Puglia, considering it one of the most promising regions in Italy for the production of high quality wines with a strong territorial identity.
Some winemakers focus on small scale production, choosing to hone their considerable legacy in winemaking to the modern pallet. Others are exploring wild yeast fermentation and using only organic stock. Another thing we notice with great relief, was how reasonably priced the Italian wines are. Yes, you could certainly find higher end wines, but we were on a mission to stock up on only the daily wines, the ones we wouldn’t think twice about opening for an evening meal.
For us, the importance of a wine is less about its pedigree than whether we can open it up and have it match well with what ever we’re eating for diner that night. We reserve our better bottles for special dinners with friends or if we’re experimenting with a new recipe and want to find that perfect pairing. But that’s our point of view on buying wines at this stage in our collecting. Find out what your point of departure is and I’m sure the Italian wines will make you very, very happy.
What ever the Italians are up to, we have to applaud it.
La viva dolce!
Here is a quick list of other wines we tasted, in no particular order and with a few comments:
Medici Ermete / Emilia-Romagna
Concerto Lambrusco Reggiano DOC NV
$19.99 CAD
Poderi Dal Nespoli / Emilia-Romagna
Il Nespoli, Sangiovese Romagna
Superiore Riserva DOC 2012
$20.99 CAD
Tenuta Olim Bauda / Piedmont
La Villa Barbera D’Asti DOCG 2011
$26.95 CAD
Marchesi Antinori / Tuscany-Umbria
Bramio del Cervo, Chardonnay, Umbria IGT 2014
$22.62 CAD
Lionello Marchesi / Tuscany
Coldisole, Brunello di Montacino 2010 DOCG
Sangiovese predominant
$49.88 CAD
Coldisole, Brunello di Montacino Riserva DOCG 2008
$75.40 CAD
*These are two exceptions to our goal this weekend (buying lower cost/high value), but we couldn’t resist. They come from one of the most famous and prestigious wine makers, both richly complex, deserving of that special event but easily fine on its own. Seek them out if you need to fill out your cellar with exceptionally crafted wines.
San Polino / Tuscany
Brunello di Montalcino DOCG
Helichrysum 2010
*It’s hard for me to find words for this one. But at $132.58 CAD a bottle, what should be said except that it is gorgeous on all accounts. Rich, dark, fruity, subtle. Wow.
Here are some of the other wine options on offer.
Related Images:
- 26
Feb 16

0
Vancouver International Wine Festival 2016
Category:Drinks,Food Tags : British Columbia Vancouver Wine Wine Festival Wine TastingIt was a busy week for wine lovers in Vancouver, BC and we were quite happy to join in the fun...at least for the final weekend of festivities. We were turned-on to the Vancouver wine festival about a year ago by our columnist and friend, Pam Miller. She’s been attending these, along with a group of friends, for many years. This year’s focus was on the wines of Italy.
The week is packed as you can tell from the schedule at a glance.
Due to time constraints (i.e. vacation time available) we decided to go up on Thursday night and stay until Sunday. We arrived too late on Thursday to take part in any of the fun that evening, which you should know is possibly the best night for the Grand Tasting and access to the Delta Lounge (more later). The crowds arrive in full force Friday and continue to the closing event, the Vintner’s Brunch on Sunday.
We stayed at an event-sponsored hotel, the Pan Pacific Vancouver. It’s adjacent to the conference centre (note the English spelling...when in Rome...) and is a pretty nice place to stay, if a bit pricey ($409 CN per night), but first the wine event, then a review of the hotel.
This was our itinerary.
Thursday, Feb. 25, 2016 – Leaving Seattle, travel to Vancouver, BC.
- Check-in Pan Pacific Vancouver
- Walk about neighborhoods, Downtown and Gaslight, and call it an early night.
Friday, Feb. 26, 2016
- Rest and enjoy the hotel, especially the fitness center and salt-water swimming pool.
- 5:30-10pm - Delta Tasting Lounge and Grand Tasting. See our friend and contributor, Pam Miller’s post (coming soon).
Saturday, Feb. 27, 2016
- Noon-2pm – Taste Italia!
- 7-10pm – Grand Tasting
Sunday, Feb. 28, 2016
- 11:30am-2pm – Vintner’s Brunch
- 2:30pm – Late check-out, starting the journey home.
Oh, my goodness. Where to begin?
We'll begin with the Taste Italia! in our next post here.
Related Images:
- 22
Feb 16

0
Single Malt Scotch Food Pairings
Category:Drinks,Food Tags : Food Pairing Scotch Whiskyby Steven
21 February 2016
A few weeks ago, Kevin brought home a dozen oysters from our favorite purveyor, Taylor Shell Fish. It was a dozen of our preferred, Totten Virginica. We decided to break into them before dinner. I had already poured myself a dram of whisky (OK, so it may have been more than a dram!). When I got done shucking the oysters and starting slurping, I still had some whisky left. This was rather unfortunate for me. A sip of whisky after an the oyster was horrible!
Imagine my surprise when I came across this article from Food & Wine about food pairings for whisky that had oysters on the top of the page. Reading on, I found that, in theory, there are whiskys that can work with oysters. Our tendency is to stay away from the smokier options which they recommend. Sounds like we'll need to keep some bolder single malts on-hand for these special oyster occasions.
The Aultmore that Food & Wine recommends looks to be a fairly reasonably priced bottle, though a little more than we typically spend. I may have to splurge a little next time I'm at Bevmo and check it out.
It sounds like we need to do some experimenting with different oysters and different whiskys to find the ones that match just right - a horrible task, I know, but someone's got to do it? We'll keep you posted on what we find.
Related Images:
- 23
Jan 16

7
Hot Stove Society Food Photography Class
Category:Food Tags : Food Photography Hot Stove Society Photography Photography Class Sarah Flotard Tom Douglas23 January 2016
by Steven
One of Seattle's preeminent restaurateurs, Tom Douglas, has a program of classes and seminars that he runs out of a kitchen classroom in Belltown. He calls the program The Hot Stove Society. Today they put on a class in food photography to which Kevin had signed me up.
We met at the Hot Stove Society kitchen at the Andra Hotel. Here we were introduced to our teacher, local food photographer, Sarah Flotard. She presented a short talk about her take on food photography including props, color, styling, and some in-camera techniques. Following this talk, we headed over to the Palace Kitchen, one of Douglas' earlier endeavors. Here we were given the opportunity to set up our own food shots using props and ingredients provided by the restaurant. They provided granola & fruit breakfast items as well as the makings for nachos. With an hour+ for each of us to grab a table to set up either or both scenarios, we had to do our own styling and settings before making as many photos as needed get the best shots we could. Sarah and some of Douglas' marketing and cookbook staff were on hand to consult.
We spread out in the front of the restaurant where we had natural light to work with, such as it is in Seattle on a cloudy, rainy day. Some used the tables, others set up their shots on the floor to make it easier for straight over-head shots. When all was done, Sarah asked each participant to submit to her our own best photo we took during the class. Here are, in mind eye, the best photos I got. With the input of you all I chose one to two to submit. Unfortunately, Hot Stove Society never published any of the participant photos and the blog page for the event is no longer online.
Regards,
Steven
Click on the images to enlarge; click on the stars below each to rate.
Related Images:
- 10
Jan 16

0
Sunday morning Eggs Benedict in 15
Category:Food Tags : Eggs Benedict RecipeSometimes you have an idea for breakfast the night before that just must be made. Getting up my typical 2 hours before Steven does, gave me plenty of time to reconsider eggs Benedict, but thankfully I wasn't dissuaded from my path by my own better judgement. Plus, I just can't see spending the $16+ each it would be to go out for Eggs Benny in Seattle. Crazy.
In spite of a few roadblocks (i.e. Not having any ham in the fridge nor English muffins and only 4 eggs), the eggs came out pretty well for this impromptu morning. Here's how I coped.
I remembered I had a spare 1lb package of deli sliced ham in the freezer...easy, just plunge it in some warm water and wait a while to thaw enough; no muffins? No problem, substitute King's Hawaiian Rolls (also in the freezer) by cutting one in half and lightly toasting it in my new Christmas carbon steel sauté pan by Matfer Bourgeat (http://www.matferbourgeatusa.com/black-steel-round-frying-pan-10); eggs you say? Well I had 4 as I said, so I decided to just cut our breakfast portions down....thereby helping us both keeping to our New Year's resolutions - 1 egg and 1/2 roll for each of us, leaving 2 eggs for the hollandaise.
A time and pot saving note: instead of having separate pans out for melting butter, poaching eggs, browning the toasts, and making the hollandaise, why not combine some tasks using just 2 pans and a 1 cup Pyrex measuring cup? I melted the butter needed for the hollandaise in the glass pitcher in the microwave at 80% power (full power explodes all the water in the butter too easily..such a mess); used the carbon steel pan to toast the roll halves and reheat the slices of ham; a poaching pan (in this case a 8" All-Clad [http://www.all-clad.com] sauce pan) did double duty as a bain marie for making the hollandaise and for poaching the eggs.
The hollandaise was quickly done as my first step, but needed to be reheated slightly over the now cooling water used to poach our eggs. And there you have it, all done in under 15 minutes. A little fresh ground white pepper and some salt flakes and it's time to tuck in.
My steps:
1. Hollandaise - Make hollandaise using a small, rounded sauce pan for making the sauce placed in the makeshift Bain Marie of slightly simmering water awaiting the eggs for poaching. I saved seasoning and acid addition (lemon) for the very last.
2. Rolls - Split and toast rolls in the same pan intended to reheat your ham. No need to drag out the toaster or toaster oven.
3. Ham - After you've removed the toasted roll halves, slide two slices of deli ham in same pan. It will be fine just using the residual heat from toasting the buns and prevent the ham from drying out.
4. Poach eggs - We like ours very, very running, so this took a mere minute or two tops of gently simmering them in the water turning them over once or twice in the water. I scoop out the eggs with a slotted spoon, and quickly dry them off by rolling them in my paper towel covered hand equally cautiously.
5. Plating - pretty straight forward as I did it here, but get creative! Maybe deconstruct the elements for an avant-garde approach?

Sent from my iPad
Related Images:
- 10
Dec 15

0
Hawaiian Vanilla Company
Category:Food,Travel Tags : Hawaii VanillaIn Kevin’s article about making our Thanksgiving Cranberry Compote he mentioned our vanilla extract. This gave me the idea to write a quick note about it as well.
As you may, or perhaps not, know that Kevin and I are fond of travelling to Hawaii when we can. Our favorite is the Big Island. It’s one of the more diverse and for us, the most interesting and relaxing. But having been there so many times, we are always on the lookout for new things to do and try. There’s always some we haven’t done. Our visit a few years back was no exception. What we found was that there is now a vanilla farm on the island. It’s the first, and at the time only, vanilla farm in the US. Simply called Hawaiian Vanilla Company. Check out their website for more info: http://www.hawaiianvanilla.com. It may not sound terribly exciting, but we’ve certainly never seen where vanilla comes from. Luckily, they offer tours with lunch. We booked for a few days after we got settled on the island as it’s on the Hilo (east) side of the island, a couple hours’ drive from where we’re staying.
We arrived in good time and after checking in we were escorted into the humble dining room along with a number of other groups. Lunch was simple and of course featured their own vanilla in a number of dishes. During the meal introductions were done by the proprietor, Jim Reddekopp. The operation is a family affair. He and his wife quit their hectic careers at the resorts on Waikiki to start this farm and brought their kids with them. All of whom have some hand in the operations and activities of the farm.
After lunch we were treated to a tour of the gardens, kitchens, and vanilla greenhouses led by Jim himself. Before this, we had no appreciation for the level of detail, care and patience that goes into growing some much as a single vanilla bean, let alone thousands. I seems to recall they mentioned having to pollinate the flowers by hand. If you've ever grown orchids at home, you'll know how long they it takes to get a new flower stalk. The vanilla plant, being an orchid itself, takes a while as well.
If you ever find yourself on the Big Island, this is worth the trip to the “cold” side for a day off the beach.
So back to the point of this article. One of the things we learned on the tour was how to make vanilla extract and the difference between pure vanilla and imitation or artificial vanilla. I won’t go into this distinction here, but you may want to stay away from anything that says ‘vanillin’ on the ingredients. The making of vanilla extract is really quite easy. It just takes time.
Here’s how.
Ingredients:
- 8-10 whole vanilla beans
- 175ml bottle of vodka, rum, or bourbon
Slit the vanilla beans length-wise, you can leave the halves attached at the stem, or not. Do not scape out the seeds. Place each bean in the liquor of your choosing. We prefer vodka as it doesn’t impart its own flavor to the vanilla.
Now, place it in a cool, dark place just let it sit, for the most part. I lay the bottle on its side so the beans stay submerged completely. On occasion, when you think of it, give the bottle a little rotation to move things around a bit. You don’t need to do much, just enough to redistribute the beans and liquor. In time, a few weeks, perhaps a month, open the bottle and give it a sniff, if it still smells like liquor and alcohol, it’s not done. If it smells mainly like vanilla, by all means start using it.
Since we’re making it in such a large bottle, it’s not convenient to keep this in the spice cupboard. So what we’ve done is to transfer some into a smaller, brown glass bottle (UV protected) to keep in the kitchen. We keep another whole (slit open) bean in this jar as well.
As you use the extract from the large bottle, it can always be replenished. When about 1/3 down, add another bean or two and refill with more liquor. This will yield a never-ending supply of extract.
We even made up small bottles of extract one year to give as Christmas gifts for friends and family. We used the Amber Boston bottles from Specialty Bottle here in Seattle (phone/internet orders only): http://www.specialtybottle.com with the shrink bands to seal them shut. If I were to do it again I would get the ones with a dropper cap.
Related Images:
- 09
Dec 15

0
Pinot Noir Cranberry Compote
Category:Food Tags : Carnberry Dundee Hills Oregon Pinot Noir Stoller Family WillametteI was looking for something new this Thanksgiving to add to the several condiments on the table. Typically, we have the ‘standard’ homemade cranberry sauce. Some years it does more toward chutney with the addition of mild peppers, some years straight up Midwestern with just some orange slices and zest for kick. This year though, after spending some serious time (and spending some serious money) learning about wines, particularly those of the Pacific Northwest, I wanted something to showcase the region and the kinds of herbs we have here year round. So when I came across this recipe from NYT Cooking iPad application I was thrilled. It had all the basic elements I was looking for. Of course I would tweak it, I can’t resist.
Here’s the basic recipe from the New York Times:
Cranberry Sauce With Pinot Noir
by Jeff Gordinier
Time: 20 minutes, plus cooling
Yield: 2 1/2 cups
http://cooking.nytimes.com/recipes/1016895-cranberry-sauce-with-pinot-noir
INGREDIENTS
- 10 whole allspice berries
- 10 whole cloves
- 10 whole black peppercorns
- 4 cups fresh or thawed frozen cranberries
- 1 ½ cups Oregon pinot noir
- 1 cup light brown sugar, loosely packed
- 1 cup clover or wildflower honey
- 1 cup fresh orange juice
- 6 strips orange zest, about 1 inch by 3 inches, removed with a vegetable peeler
- 2 (4-inch) sprigs rosemary
- 1 small cinnamon stick
- 1 vanilla pod
Here’s how I altered it.
I halved the amount of all the ‘seeds’ (5 whole allspice berries, 5 whole cloves, 5 whole black peppercorns). Instead of grinding them as the recipe says, I knew I wouldn’t like the gritty mouthfeel that might result if I followed the original recipe. I’ve had the experience in other recipes when grinding up berries and seeds gives that rough feel to the final product.
I also decided that the berries, and cinnamon stick, could use some flavor enhancement. Why not dry pan toast them? You have to be very careful when doing this, and don’t get distracted in the process of toasting dry berries, they burn VERY quickly. Into a seasoned iron skillet the allspice, clove, peppercorn, and cinnamon stick goes, medium heat….and watch, watch, watch until you begin to smell those aromas drifting up to your nose. Then take it off heat and let the residual heat of the pan continue to toast them for a bit, moving them around the pan frequently. Take them out of the pan into a small dish or ramekin to cool. I place them in a store bought spice bag made of cheesecloth. I can’t tie a secure knot to save my life, so I buy them already made, but if you’re knot-capable, go for it make your own out of cheesecloth.
I made the remainder of the base recipe pretty much the same, using fresh cranberries, and excepting I didn’t have vanilla bean available so I used pure vanilla extra we make ourselves from Hawaiian Vanilla Beans (http://www.hawaiianvanilla.com) and vodka. We always have a gallon brewing in the lower level of the house. We just happen to have neighbors who, among other things, have bees. We used their own honey here too. I nice personal touch. If you have local beekeepers, try theirs. It’s quite a clean tasting product, very different from store bought.
An important part of the recipe is to use a good Pinot Noir. We have come to love the Pinot’s from Oregon, in particular those from Stoller Family Estates (http://stollerfamilyestate.com). We used a 2012 Pinot Noir and it turned out amazing. Our guests literally exclaimed at how good it was. As a home cook, you pay attention when more than one guest says something like, “This is really amazing, the very best cranberry sauce I’ve EVER had.”
I almost never reproduce a recipe as written by someone else, I always tinker. Go ahead make this cranberry sauce your own. The wonderful notes from a good Pinot, the rosemary, and the honey come together very well. I don’t think you’ll be disappointed.

