Category Archives: Sous Vide

  • 0

Snowy Day Chuck Roast

Category:Food,Sous Vide


Snowy Day Chuck Roast Sous Vide Style

What’s better than a slow cooked beef roast packed with flavor? Have this on a wintry day, or any day, you’re craving comfort food without the fuss.
Course Main Course
Cuisine American
Keyword beef, chuck roast, Keto, sous vide, Sunday dinner
Prep Time 15 minutes
Cook Time 1 day
Total Time 1 day 15 minutes
Servings 4 People
Author Kevin

Ingredients

For the Roast

  • 3-4 Lbs Beef boneless chuck roast Bone-in would be great too.
  • 2 Sprigs Fresh rosemary Leave whole
  • 6 Cloves Peeled, fresh garlic, smashed
  • Salt & pepper Be generous
  • 1 Carrot, peeled and diced
  • 1 Stalk Celery, diced Make dice similar size to carrot
  • 2 Bay leaf
  • 3 Tbsp Avocado oil Don’t use olive oil, smoke point is too low.

For the Sauce

  • Contents from cooking bag
  • 1 Tbsp Tomato paste
  • 1 Cup Rustic red wine
  • 2 Tbsp Chilled butter Optional

Instructions

Pre-Searing

  • Using your sous vide, ours is the Joule from Chef Steps, set the cambro 3/4 way filled with water on a heat resistant pad to protect your countertops from the long cook this will need. Choose your temp. Here we’re going for that traditional roast look and taste, so we chose 136F. For more info on cooking this beast go to www.chefsteps.com.
  • Preheat a large, flatbottomed saute or frying pan on high until smoking hot. Thoroughly season your roast after patting it dry. You need to have the meat surface as dry as possible. Season all sides of the roast.
    Turn on the exhaust fan!
    Add the oil, swirl around to cover the surface of the pan. As soon as little whisks of smoke appear, slap down that roast in the pan. Use tongs to push down the roast so all parts are in contact with the pan. Give it a minute or two, depending on your heat source. Flip and do same on all sides.
    Just before removing, put in the garlic cloves and fresh veg & herbs (rosemary, carrot, celery, and bay in this case) giving them a little heat. Remove everything from pan, set aside.
    You can stop here, get a glass of wine, and get ready to bag this bad boy.

Bag It & Cook

  • Double up two freezer gallon plastic bags. Put in a small amount of oil (EVOO is good) into the inner bag. This is where you’ll put the roast and surround it with the veg evenly on both sides. Put one bay on one side of the roast the other on the other side. Easy!
    Slowly submerge the bagged roast into the heated sous vide bath. You want to get as much air out as possible from the outer and inner bags. I use the blunt end of a long wooden chopstick to push the roast down, sealing the inner bag first, then the outer. It might still bob up a little. If that’s the case, try placing a heavy spoon in the bottom of the out bag and resubmerge. 
    Hook the bags to the side if you like, or let them free-float as I’ve done here. 
    Since this is a long cook (24 hours!), you’ll need to watch the water level. It’s best to cover the opening of your pot with plastic wrap. We have these nifty white plastic pearls that float on the top to help reduce water loss.
  • Get another glass of wine, and return in 24 hours!
  • Removing Roast - Gently remove your bagged roast. I hold a towel in one hand to place under the roast as I move it to the cutting board. Take out the roast and set aside for a moment, cover. A souse vide roast doesn’t need to rest technically. You’re going to put that roast back in the water to stay nice and warm while you make a luscious sauce.

Making that Sauce

  • The key to making a great sauce is to reduce and strain...strain multiple times! We learned this from watching a few Thomas Keller video’s on sauces. Thank’s Mr. Keller. 
    At this point, dump the contents of the bag into a Windsor pan, or suitable sauce pan along with the tomato paste.
    Put the roast back into the bags...yes, back into the same bags, and reimmerse into the heated water. Don’t worry, it can’t over cook, but WILL keep your roast perfectly warm until eating time.
  • Add 1 cup of earthy red wine. Let it boil away, reducing by half until the liquid coats the back of a spoon. I don’t strain the sauce at this point because I want to get as much flavor out of the veg and herbs as possible. Plus, as they break down, they’ll thicken the sauce.
  • Strain the sauce. A good fine-meshed strainer works well here. We add a layer or two of cheese cloth to get the smoothest of sauces.
  • Return to the boil. At this point, it’s a matter of time tuning your sauce. Do the following as is your whim:
    1. Reduce further for a thicker sauce.
    2. Enhance sauce with store bought Demi glacé- we use veal Demi.
    3. Further gild the Lilly with more fat! Just before serving, pull off heat and add in a couple of tablespooons of choice butter. Think Kerry Gold! Whisk until combined.

Serving it Up

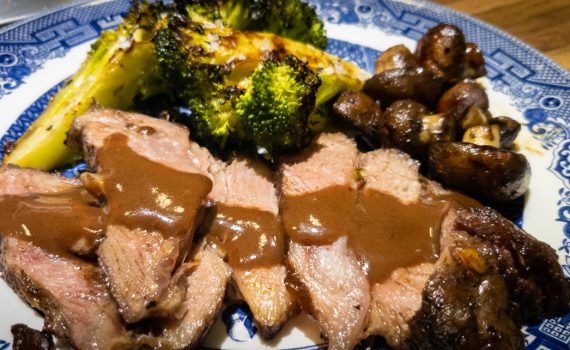
  • Remove the roast from the sous vide to a platter if you’re serving family style...best option for photo ops too.
    Get as crazy and creative as you like. 
    Add a couple of your favorite veggies to the platter, and pour on a little of that sauce you made over the meat. 
    Garnish with some fresh chopped parsley if you like..or not. Your choice, go wild.
    Bring to table and watch their faces beam.
    Plate & Serve

Copyright


www.foodfriendstravel.com

Related Images:


  • 2

Two Fish Sous Vide

Category:Food,Sous Vide

April 25, 2017

Another sous vide adventure this evening. 

I got home just before Kevin, which is unusual as we typically leave work at about the same time, but his work is 1/2 the distance from home than mine. I took the opportunity to lay down in bed for a quick bit. Before I had the chance to nod off, Kevin got home and before I knew it, my phone had a message that the Joule had reached its set temperature. At that, my curiosity was piqued about what was on for dinner.

Upon getting dressed, gathering some laundry to throw in, I made my way downstairs to find some surprises in the sous vide - two kinds of tuna, Yellow Tail and Ahi. The Yellow Tail came from our friend, Ike, an avid deep-sea fisherman, whom we visited in Arizona in February. The Ahi came from East Anchor Seafood, just up the street.

Kevin had them in the sous vide just at about 62F to get them thawed and then raised the temperature to 122F for final cooking. Unfortunately, between catching up on the day and getting the laundry started, we lost track of the time that the fish was under the supervision of the Joule. In the meanwhile, and after some discussion about what to have for sides, Kevin got our potatoes browned (previously Joule cooled) in the skillet and broccolini ready to steam. I, on the other hand, prepared myself a Martini.

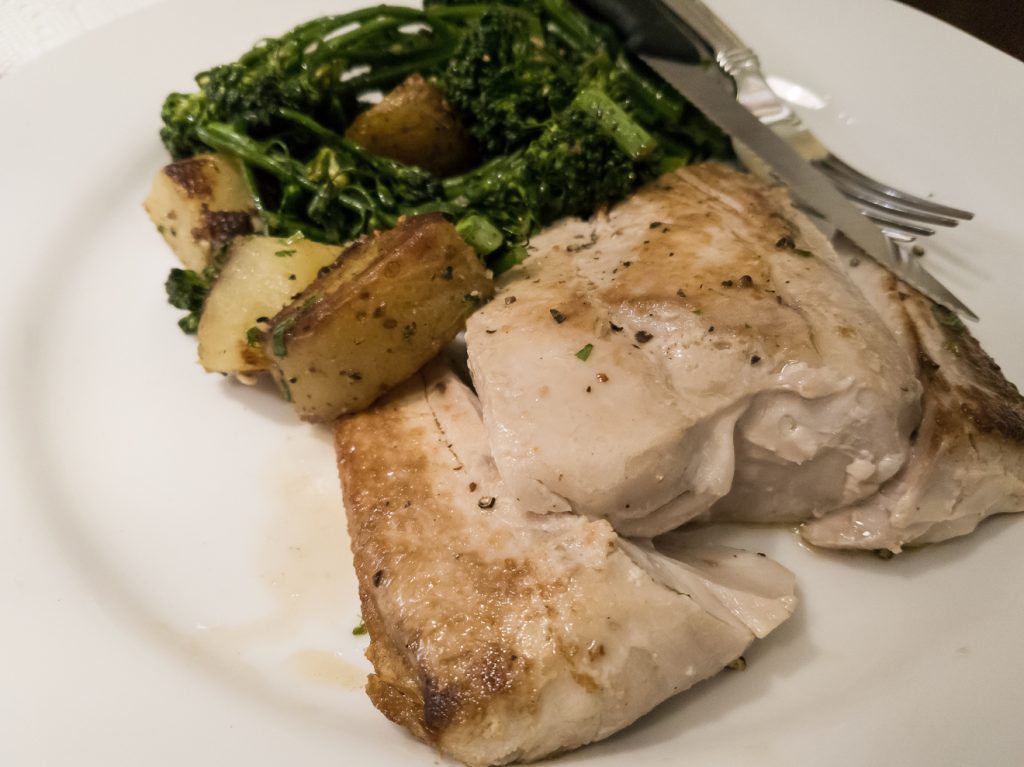
Once we deemed the fish to be done, which was pretty much arbitrary at this point, we got a pan going for searing. Both pieces of fish went in while the broccolini seamed nicely with a little chicken stock and garlic on another burner.

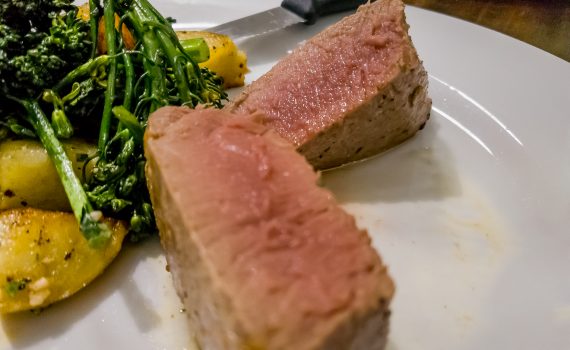
With a pat to dry each piece, it didn't take long to get a light sear on each, but it was quickly clear that we had the sous vide at too high of a temperature. The Yellow Tail was clearly cooked through to the point that it no longer wanted to stay together as one piece. However, it wasn't until I cut into the Ahi that the same error was evident. The meat was still red as you can see above, but it certainly wasn't the fish-equivalent of rare-to-medium-rare that I would have liked.

It was all still tasty, but not all that it could have been.

The lesson learned - lower temp on the sous vide. Or simply don't sous vide these cuts of fish. We'll try this again sometime but, I think, we'll target about 110F if we use the sous vide for this next time. Do any of you out there have any suggestions on how to make this better? Let us know in the comments if you do.


Steven

Food, Friends & Travel is a member of Amazon's affiliate program. By purchasing Amazon products through our website, we may earn a commission on qualifying sales. These commissions assist us in maintaining this site.


Related Images:


  • 1

The Future of Pork Belly

Category:Food,Sous Vide

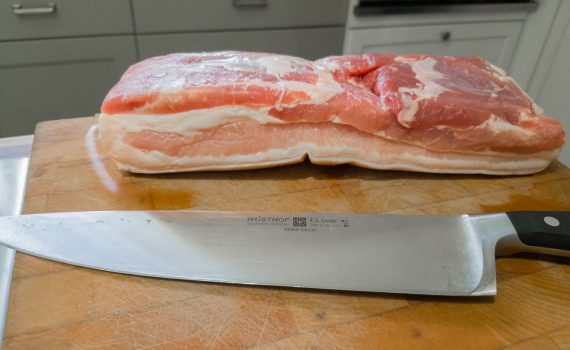
A couple weeks ago we were up at the local Asian grocery store, Uwajimaya, and found a nice slab of pork belly (the actually called it pork side). Our first thought was "Sous Vide!"  We got about a two pound piece to bring home. This weekend, we finally got around to throwing it in the sous vide and letting the Joule take over.

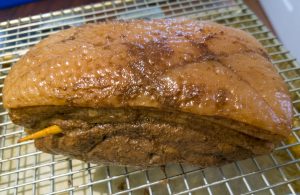
We cut it into two even-ish pieces to try two different rubs: one with just salt and sugar and one that added Chinese Five Spice powder. We read on Sous Vide Life about the need to put skewers cross-wise through the meat to keep it from curling up during cooking. We did this with the Five Spice portion, not with the other. As it turned out, even with these small pieces, it made a difference. The one with the skewers was much easier to slice in even pieces. If you do a larger piece, I would certainly recommend the skewers.

The rub: equal parts of sugar and salt and about 1 Tsp Five Spice to 1 Lbs of pork.

With both rubbed-up, Saturday they went into the sous vide for 24 hours at 154F. Our plan was to have them for dinner on Sunday. But as plans often change, we ended up going out for a lovely birthday celebration. So the pork had to wait another night, which worked out perfectly.

We took the pork out of the sous vide Sunday and put in the fridge for the night.


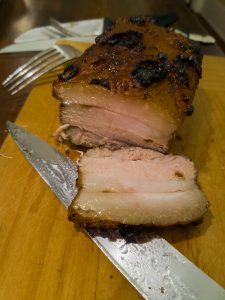
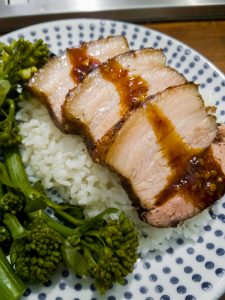
The next evening we pulled one out. To get it back up to temp, we put it back in the sous vide at 135F for an hour. This got it loosened back up and to a good "eating" temperature. It was already fully cooked and food-safe, so just needed to be warmed up. While it was finishing up, we got the broiler going to finish it. After the hour in the sous vide, it went under the broiler for about 10 minutes to crisp. Here's the result.


Meanwhile, Kevin created a sauce by pulling nearly everything 'Asian' out of the fridge: soy sauce, fish sauce, hoisin, Taiwanese peppers, ginger, garlic, and mirin. I can't give proportions here as we didn't keep track. If you decide to do this yourself, adjust as you wish. The rice was already in the works. All that was left was to steam some broccolini.

In the end, we ended up with a fantastic tasting dish. The pork wasn't quite as tender as we had hoped, but the flavor was certainly there! If we do this again, we'll probably drop the temp a bit and/or deccrease the time.

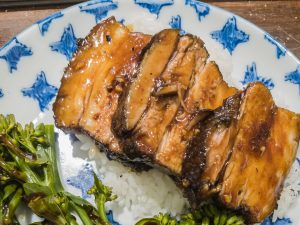
Here's how the final dish presented. Kevin had a little more sauce, mine the lesser.


I know most of you don't have a sous vide machine - yet! But if you try this, please let us know how it turns out. If you have a different way of cooking pork belly let us know that too. 


See our other recommendations here

Related Images:


  • 1
Bacon, Food, Sous Vide

Bacon! a la Sous Vide

Category:Food,Sous Vide

Who doesn't love bacon? (Sorry vegetarians and the pork-adverse!)

Well, we love bacon. But we don't love cooking bacon. Granted there are worse smells you can have in you home than bacon, but it's does tend to linger and permeate the house. We've found a better way: sous vide, thanks to chefsteps.com and Joule.

Shop our other recommendations here

This technique may not be for all bacon lovers. It doesn't make crisp, snappy bacon. If you like softer bacon with a little more chew, more tender and some fat left in it, this may be for you.

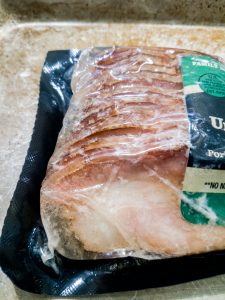
The ingredients are simple, just 1 Lbs of bacon. It can even be from you freezer. Here in Seattle, we're able to get Hempler's Uncured Thick-cut Bacon. It's still smoked but no added nitrates*. We think it tastes a little more "natural" and not quite as "salty." You're call on the cured vs uncured. Just saying, that's what we used.

The one intangible ingredient you need is time. With the Joule set at 147F/64C, this takes as "little" as 9 all the way to 48 hours depending on how tender you want it in the end (and how long you want to wait). So some advanced planning is required here. Once the bath is up to the set temperature, just through in the whole vacuum sealed package the bacon come from the store in. And wait....or just go to bed and try to sleep in the next morning even knowing that bacon is waiting for you.

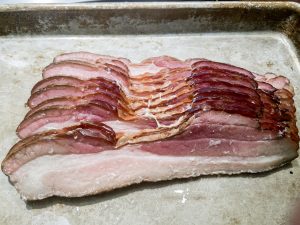
What it looks like just out of the bath:

Bacon, Food Bacon, Food

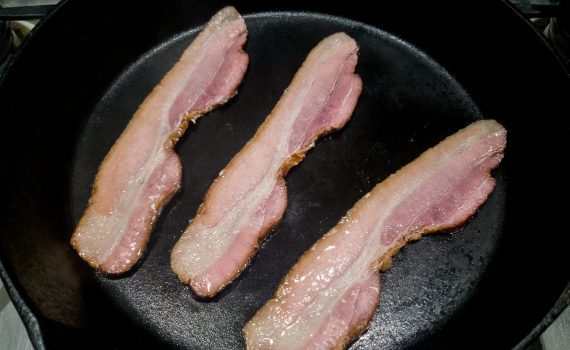
In the morning, it couldn't be easier. Just get out your trusty cast iron skillet or carbon steel pan or any pan, really, that can get smokin' hot. Don't use a Teflon pan, it won't like this much heat. When the pan is good and hot, throw on a few strips and let them sizzle for only 30 seconds. Chef Steps suggests just doing one side. We like it better with both sides seared. Just remember it only needs 30 seconds on each side since it is technically fully cooked already. You're just crisping it up a bit. Serve immediately!

Bacon, Food

This first photo is with both sides fried. The next shows the strips fried on only one side, the fried side showing on the left and un-fried side showing on the right.

Sous Vide Bacon Sous Vide Bacon

The bonus feature is that you can have bacon all week long, if you don't eat it all on the first go. It can stay in the fridge so that you can quickly fry up a slice or two in the mornings throughout the week. Bacon in just a minute. In the words of dear Ina Garten, how good is that?


* We'll leave it to you to do your own research on the nitrate situation. Apparently nitrates occur naturally in many of the vegetables that dietitians and nutritionist suggest we eat. We choose "no nitrate added" bacon just because we like the taste better. To us, it's a more "natural" flavor and not as "salty." As with all things meat, moderation is key.

Related Images:


  • 2
Prime Rib, Sous Vide

Prime Rib 2 – Sous Vide Style

Category:Food,Sous Vide

Christmas Day dinner with friends began the day before with the arrival of a hefty 3-rib prime rib roast. We knew that to sous vide a roast this size would take many, many hours, so it was necessary to have it handy Christmas morning to start the sous vide process.

It's gotten to be our tradition to have Christmas dinner with our friend David (ever since Steven had foot surgery Christmas Eve a few years back). In exchange for us cooking dinner, David provides the most wonderful prime rib roasts. He gets them at Metropolitan Market in West Seattle. This year's roast is from the blade end so it has a little more marbling - perfect! See our earlier post for tips on buying your rib roasts:

We consulted two websites for information and recipes on all-things sous vide: ChefSteps and Anova Culinary. We bought the Joule sold by ChefSteps, and that gave us access to their Premium area that contains extensive resources and training videos as well as other opportunities the Joule team dreams of. Plus we just like that ChefSteps is local, located in our very own Pike Place Market.

Shop our other recommendations here.

From a web search for sous vide prime rib recipes, we landed back at ChefSteps. Here’s the link to their  herb crusted (prime) rib roast recipe, which they say was inspired by their own traditional rib roast recipe. At this writing, we’re having difficulty accessing the link on the iPad, but it works just fine on the iPhone, Samsung Galaxy, and MacBook Air. Hey Joule Team, you might want to look into this.


From ChefSteps:

ChefSteps Variation Temp & Time
-1 Prime rib (rib roast), about 3 ribs Ours was a “chuck” or blade end roast with 3 ribs, but the butcher cut it close to the 4th rib giving us more meaty goodness. Complete with herb crust. 128F, 7 hours. ChefSteps meat guide places this in the Medium Rare category, just as we like it.

Timing was a bit longer than ChefSteps says (their’s puts it between 3 and 5 hours). We were having too much pre-dinner fun and just that puppy sit in the water, knowing it wouldn’t over cook.

Love this about sous vide!

The prep time takes a lot longer that you might think. That’s why we opted for a pre-prepped roast, saving us probably an hour or so. Remember, we’re novices at preparing such a large roast, it might take you a lot less time.

Before going into the sous vide, ChefSteps recommends browning it on all sides. This just takes maybe 3 minutes on each side – about 10-12 minutes total.

Be careful not to burn the roast so use a lower temp than we would in searing fish for instance.

-Salt
-Pepper
-Rosemary-garlic (3 cloves crushed)
-No variation
-No variation
-One sprig, cut in two pieces
-4 cloves crushed
 
For herb crust:
-Herbs (fresh such as rosemary and thyme)
-Black pepercorns, whole
-Salt, Maldonado flake
-1 egg white
-Stock, beef
-We skipped this entirely as our roast was pre-herbed from the butcher.  
Prep:    
-To french or not? Nope, no Frenching for us.  
-Scoring sides Nope, didn’t do this either. Sounded too complicated, plus we didn’t French it so we thought to skip this.  
-Separating Bones Once again, we didn’t need this step as our butcher already took the rib bones off the roast and tied the roast back together.  
-Removing membrane We seriously thought about this step, and…yep, decided to skip it. No particular reason expect we were not feeling too motivated Christmas morning what with all the presents to open and such.  
Presear
- Salt & pepper
- Rosemary
- garlic
- cooking oil
After seasoning roast on all sides, sear in pan over medium heat. We used a cast iron pan, which heats evenly and keep the heat longer than other pans we have.

This smokes up the house, so turn up the exhaust fan to high!

 
Bag it and get it going We don’t have sous vide bags, so we doubled bagged it in oven roasting bags. ChefSteps cautions against using regular zip close freezer bags for longer cooking as the seams my give out.

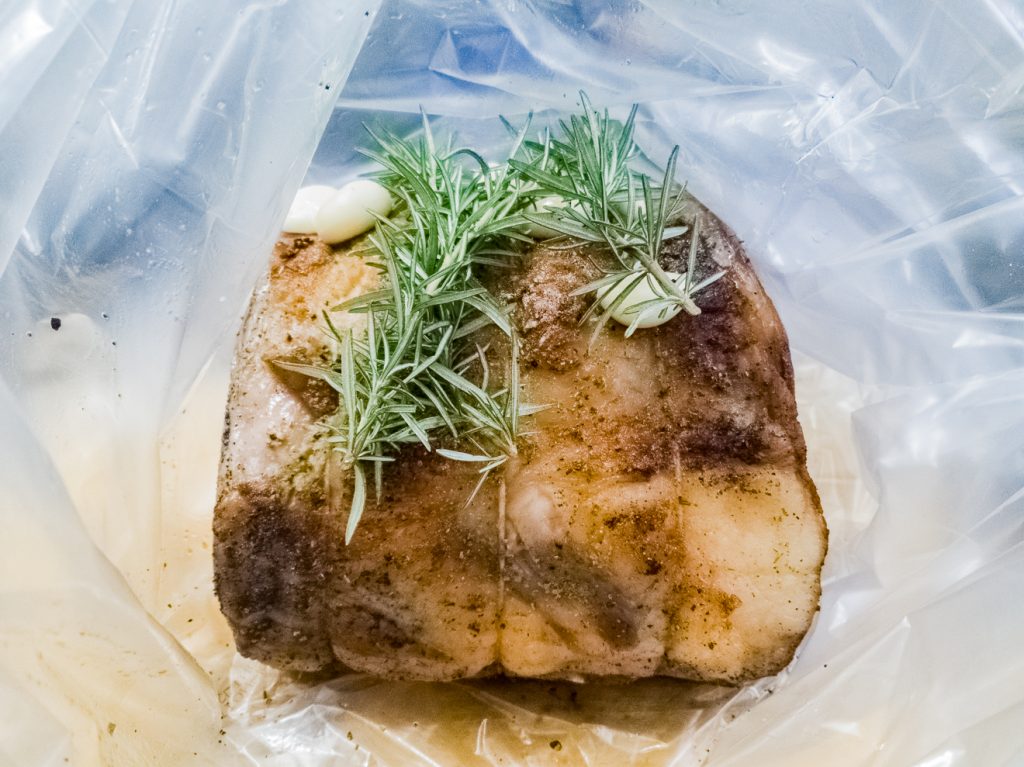
Otherwise, we followed their guidelines and placed the roast in the inner bag along with the rosemary springs and crushed garlic.

We used the water seal method since we don’t have a sealer (submerge the bag in water to force the air out then fold and clip to seal). This works just fine.

 
Cook
- 4-6 hours
7 hours was our total time in the sous vide. Even at this length of time, the roast felt a little too squishy. We feared it would be European rare, which is cool…not something we like.
Finish

- 475F oven for 5-15 minutes

Oven sear for 10 minutes. Our roast was PERFECTLY cooked, but we wanted a little extra crisp, so we put the roast in the oven as ChefSteps suggested
Sauce This got a little interesting. We kept the juices from the roasting bag and used it as the base for our sauce.

I had a little kitchen accident – knocking the sauce pan off the stove. Maybe it was being bowled over by the beauty of the roast, or it could have been due to the glasses of wine consumed during oysters and our first course.

Luckily I had a back-up sauce from another meal and just enhanced it with what was salvaged from the spill.

The roast ready to start in the sous vide bath:

Prime Rib, Sous Vide

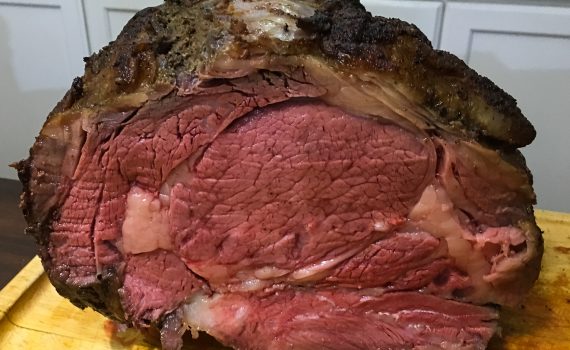
This was probably the most delicious, tender, perfectly cooked rib roast we’ve ever cooked or had at a restaurant. Honestly, it was. We’re not kidding.

We had plenty of left overs from the four of us, and that was with a couple of people going back for seconds. Alas, my sauce didn’t last.

Accompanying our Christmas Day meal was a potato-noodle savory kugel and roasted carrots and green beans seasoned with garlic, salt, pepper and Harissa.

We can’t recommend sous vide cooking enough. Since getting our Joule a month or so ago, we’ve experimented with several meals, most turned out exceptionally well. Go get yourself one of these, it’s not just kitchen toy, it’s really very useful as an all-around tool for the home cook.

Related Images:


Subscribe to our Newsletter

Please follow & like us :)

error: Content is protected !!